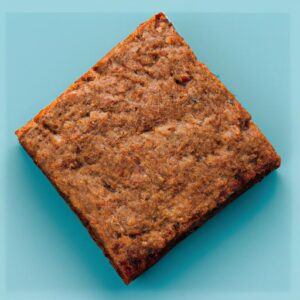
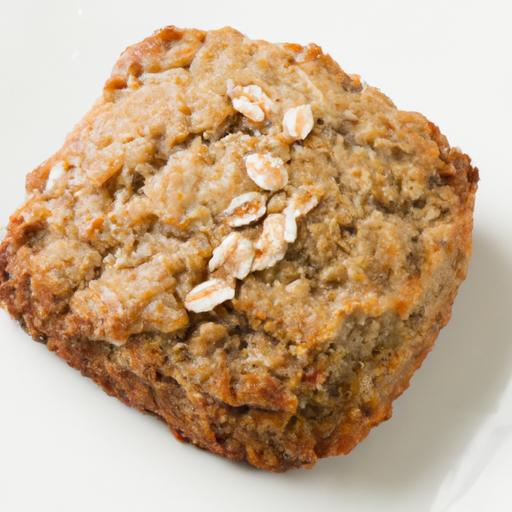
Mastering Alternative Flours for Perfect Texture and Flavor
Unlocking the secrets of tasty grain-free baking bliss begins with choosing the right alternative flours that combine to create irresistible texture and depth of flavor. Unlike traditional wheat flours, grain-free options like almond, coconut, and tigernut flour bring not only unique tastes but also a delicate balance in moisture and crumb. For instance, almond flour adds a rich, buttery finish and tender bite, while coconut flour offers a subtle sweetness and excellent absorbency to hold moisture in. Combining these thoughtfully can mimic the familiar softness of classic baked goods without any grains.
When working with alternative flours, understanding each one’s hydration tendencies is crucial. For example, coconut flour soaks up more liquid than others, which means even small substitutions can require additional eggs, wet ingredients, or natural binders to avoid a dry, crumbly outcome. This dance between flour and moisture ultimately determines whether your bake is delightfully tender or disappointingly dense.
harnessing Natural Binders to Elevate Grain-Free Recipes
Natural binders like flaxseed meal, chia seeds, and psyllium husk powder are essential allies when embracing grain-free baking. They not only help hold the batter or dough together but also contribute subtle nutritional boosts. For example, mixing 1 tablespoon of ground flaxseed with 3 tablespoons of warm water and letting it gel replicates the binding properties eggs provide, making it ideal for vegan or allergy-friendly versions.
Eggs themselves are remarkable at maintaining structure and softness,but if your searching for an eggless option,mixing chia or psyllium husk powder with water builds a similar elastic network in the dough.these binders also help maintain moisture throughout baking and enhance shelf life, resulting in a final product that remains fresh longer.
Sweetening Strategies That Enhance Without Overpowering
Grain-free baking invites creativity with natural sweeteners that lend flavor complexity without overwhelming the palate. Honey, maple syrup, and coconut sugar are popular options, each imparting distinct notes-honey’s floral warmth, maple syrup’s earthy richness, or coconut sugar’s caramel undertones.
Using liquid sweeteners requires balancing by reducing other wet ingredients to avoid excess moisture, while granular sweeteners behave similarly to refined sugar in providing structure and crispness. Incorporating a touch of vanilla extract or citrus zest can elevate sweetness subtly and lend aromatic depth,complementing rather than masking the natural flavors of nutty flours and spices.This approach results in grain-free baked goods that feel indulgent yet light.
Tips for Achieving Moisture and Freshness in Every Bite
Maintaining moisture in grain-free baking can be tricky but is paramount for that perfect tender crumb. Including ingredients like applesauce, mashed banana, full-fat yogurt, or even a splash of coconut milk can contribute both moisture and a hint of tang, uplifting the overall flavor. These additions also add a velvety texture and help counterbalance the drying tendency of some grain-free flours.
Another secret is to avoid overbaking. Since grain-free flours brown faster, setting a timer a few minutes sooner than usual and checking for doneness with a toothpick prevents drying out. Additionally, storing baked goods in an airtight container with a slice of bread or an apple wedge helps retain freshness.
by embracing these principles-thoughtful flour blends, strategic use of natural binders, balanced sweetening, and mindful moisture management-you’ll unlock the artistry behind stunning grain-free bakes that delight with every bite.
Prep and Cook Time
- Planning: 20 minutes
- Cooking/Baking: 25-30 minutes
- Total Time: 45-50 minutes
Yield
yields approximately 12 servings (standard muffin size or small loaf slices).
Difficulty Level
Medium: Suitable for bakers cozy with measuring alternative flours and adjusting textures.
Ingredients
- 1 ½ cups almond flour, finely ground
- ½ cup coconut flour, sifted
- 3 tbsp ground flaxseed (for binder)
- 9 tbsp warm water (to gel flaxseed)
- 3 large eggs, at room temperature
- ½ cup honey or pure maple syrup
- ¼ cup coconut oil, melted and cooled
- 1 tsp baking soda
- ½ tsp sea salt
- 1 tsp vanilla extract
- 1 medium ripe banana, mashed (for added moisture)
Instructions
- Prepare the flax egg: In a small bowl, mix ground flaxseed with 9 tbsp warm water. Whisk lightly and let sit for 10 minutes until gelled.
- Preheat your oven to 350°F (175°C).Line a 12-cup muffin tin with paper liners or grease a loaf pan.
- Combine dry ingredients: In a large mixing bowl, whisk together almond flour, coconut flour, baking soda, and sea salt.
- mash the banana until smooth in a separate bowl.
- Mix wet ingredients: in another bowl, beat the eggs, then add honey (or maple syrup), melted coconut oil, vanilla extract, mashed banana, and the flax egg gel. Stir until fully combined.
- Incorporate wet and dry: Gradually fold the wet mixture into the dry ingredients. Stir gently until no dry streaks remain – be careful not to overmix, as this can tighten the batter and toughen results.
- Fill your pans: Spoon batter into muffin cups or pour into the loaf pan, spreading evenly.
- Bake: Muffins need 20-25 minutes,a loaf 30-35 minutes. Begin checking for doneness at 20 minutes by inserting a toothpick-it should come out mostly clean with just a few moist crumbs attached.
- cool and rest: Let baked goods cool in the pan for 10 minutes before transferring to a wire rack. This step prevents them from becoming soggy from residual steam.
Chef’s Notes and Tips for Success
- Flour Variations: Substitute tigernut flour for coconut flour to mellow the coconut note if desired, but reduce the quantity slightly due to lower absorbency.
- Binder Alternatives: Use chia seeds instead of flaxseed using the same ratio, or add 1 tsp psyllium husk powder for extra structure.
- sweetener Choices: Experiment with date syrup or brown rice syrup for different flavor twists, adjusting wet ingredients accordingly.
- Storage: Keep baked goods airtight or frozen to maintain moisture. Warm briefly before serving to rejuvenate texture.
- freezer Tip: Wrap individually and freeze up to 3 months for grab-and-go snacks.
- Prevent Dryness: Always monitor oven closely; alternative flour bakes can dry out rapidly if overexposed to heat.
Serving Suggestions
Enjoy your grain-free delights slightly warm, paired beautifully with a dollop of coconut whipped cream or a smear of almond butter. A sprinkle of toasted sliced almonds or finely chopped fresh berries adds inviting color and contrast. For a brunch twist, serve alongside fresh fruit salad and a cup of Earl Grey or chamomile tea.
| Nutrition (per serving) | Calories | Protein (g) | Carbs (g) | Fat (g) |
|---|---|---|---|---|
| Muffin/Slice | 210 | 6 | 18 | 14 |

For further insights, explore our Best Grain-Free Baking tips. To deepen your knowledge of alternative flours, visit Cultures for Health for expert guidance on flour characteristics and uses.
Q&A
Q&A: Unlocking the secrets of Delicious Grain-Free Baking Bliss
Q1: What exactly does “grain-free baking” mean?
A1: Grain-free baking is the art and science of creating baked delights without using any grains such as wheat, barley, rice, or oats. Instead, it embraces alternative flours and ingredients derived from nuts, seeds, tubers, and legumes to craft textures and flavors that rival traditional baked goods – all while catering to those with grain sensitivities or anyone seeking a wholesome twist.
Q2: How can I achieve the perfect texture in grain-free baked goods?
A2: Texture is the golden key to grain-free success. Unlike wheat flour, which contains gluten for elasticity and structure, grain-free flours need a bit of extra love. Combining moist ingredients like eggs, yogurt, or applesauce and binding agents such as xanthan gum, psyllium husk, or chia seeds helps create that tender crumb or chewy bite. Experimenting with blends-like almond meal paired with coconut flour-can also balance moisture and density.Q3: Are grain-free flours easy to substitute in traditional recipes?
A3: There’s no one-to-one swap, but with a little finesse, you can adapt many recipes. Grain-free flours behave differently: some absorb more liquid, others add richness or a nutty bite. Rather than swapping straight across, start by reducing the total flour quantity and increasing liquids slightly. Don’t be afraid to test small batches and enjoy the delicious discoveries!
Q4: What are some common grain-free flours and their flavor profiles?
A4: embrace the diverse palette of grain-free flours:
- Almond flour: rich, slightly sweet, and moist with a tender crumb.
- Coconut flour: absorbent with a gentle coconut aroma; it requires more moisture.
- Cassava flour: mild and subtly sweet, great for light textures.
- Tiger nut flour: nutty with a naturally sweet character.
- Chickpea flour: earthy and hearty, adding depth to savory bakes.
Q5: Can grain-free baking be just as versatile as traditional baking?
A5: Absolutely! Grain-free baking opens a world of culinary creativity. From fluffy muffins and crispy crackers to decadent cookies and tender breads,the possibilities are vast. Using natural sweeteners, spices, fruits, and nuts elevates flavor profiles and texture in unexpected ways.Grain-free doesn’t mean limited-it means deliciously imaginative.
Q6: How does grain-free baking benefit digestion and nutrition?
A6: Without grains, you eliminate gluten and many common allergens, which can ease digestion for some individuals. These alternative flours often pack more fiber, healthy fats, and micronutrients like vitamin E, magnesium, and iron.Grain-free baking can support balanced blood sugar levels too, depending on ingredient combinations.
Q7: How can I prevent grain-free baked goods from drying out quickly?
A7: Moisture retention is the secret to lingering bliss. Incorporate ingredients rich in moisture-like mashed bananas, pumpkin puree, or ripe apples-and balance them with fats such as coconut oil, avocado, or nut butters. Store baked treats in airtight containers and consider freezing extras to lock in freshness.
Q8: Where can I find grain-free flour blends or should I make my own?
A8: Specialty stores and online markets offer a variety of pre-made grain-free flour blends tailored for cakes, breads, or cookies. However, custom blending your own flours allows for personalized textures and flavors. Start with basic combos-say, almond flour plus coconut flour-and tweak ratios according to your favourite results.
Q9: Does grain-free baking require special equipment?
A9: Not at all-your classic mixers,baking pans,and measuring tools will do the trick. Some bakers find using silicone spatulas and parchment paper helpful due to the stickier and more delicate nature of grain-free batters.A food processor can also ease blending nut-based flours.
Q10: What’s the best way to start a grain-free baking journey?
A10: Begin with a simple recipe-perhaps chocolate chip cookies or banana muffins using almond and coconut flour. Get comfortable with ingredient swaps and the feel of grain-free doughs. From there, embrace experimentation and enjoy the delightful world of grain-free creations that nourish your body and excite your palate!
To Conclude
As you close the chapter on your journey through the world of grain-free baking, remember that unlocking these secrets is not just about avoiding certain ingredients-it’s about embracing a new realm of flavors, textures, and possibilities. With thoughtful substitutions and a dash of creativity, grain-free baking transforms from a challenge into an art form, inviting you to savor every bite without compromise.Whether you’re catering to dietary needs or simply seeking a fresh twist on your favorite treats, the bliss of grain-free baking awaits your next delicious creation. So gather your ingredients, trust the process, and let your oven be the gateway to wonderfully wholesome, grain-free delights.
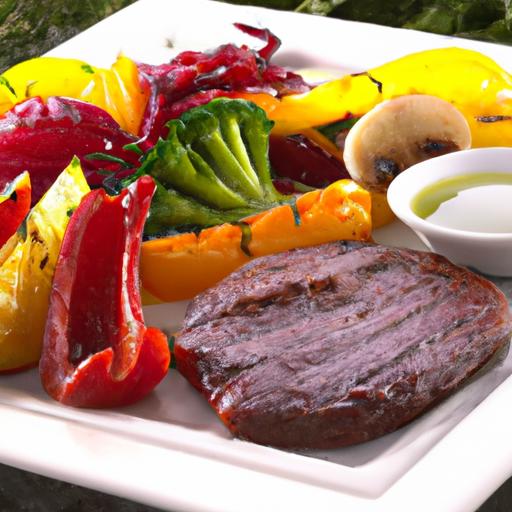
Savor the Flavors of the Mediterranean grill by embracing the heart of its cuisine-fresh, authentic ingredients that marry tradition and boldness.From sun-ripened olives to fragrant herbs and spice blends bursting with character, each component plays a crucial role in awakening your senses and elevating your grilling experience. This journey invites you to master the art of marinades,unlock vibrant spice combinations,and perfect grilling techniques that coax out an irresistible char and juicy tenderness every time you light the coals.
Prep and Cook Time
- planning: 20 minutes (plus 2 hours marinating)
- Cooking: 15-20 minutes
- Total Time: Approximately 2 hours 40 minutes
Yield

Serves 4 hungry grill enthusiasts
Difficulty Level
Medium – Perfect for grilling aficionados ready to elevate their technique
Ingredients
- 1 lb boneless, skinless chicken thighs – tender and perfect for absorbing marinades
- 3 tbsp extra virgin olive oil – the backbone of Mediterranean flavor
- 2 cloves garlic, minced – for pungent depth
- 1 tbsp fresh lemon juice – adds radiant acidity
- 1 tbsp dried oregano – a classic herb that evokes sun-drenched landscapes
- 1 tsp smoked paprika – infuses a subtle smoky warmth
- 1 tbsp ground cumin – earthy and aromatic
- 1 tsp ground coriander – brings a citrusy lift
- Salt and freshly cracked black pepper – to taste
- Fresh parsley, chopped (for garnish)
- Optional: 1/2 tsp red chili flakes – for a spirited kick
Instructions
- Prepare the marinade: In a medium bowl, whisk together extra virgin olive oil, minced garlic, lemon juice, oregano, smoked paprika, cumin, coriander, salt, and black pepper.For subtle heat, add chili flakes if desired. This blend marries bold flavors with undeniable freshness.
- Marinate the chicken: Add the chicken thighs to the marinade, ensuring each piece is thoroughly coated. Cover and refrigerate for at least 2 hours-overnight maximum-to allow the spices to deeply penetrate the meat.
- Prepare your grill: preheat to medium-high heat (around 400°F/200°C). Ensure grill grates are clean and oiled to prevent sticking and achieve those iconic char marks.
- Grill the chicken: Place the marinated chicken thighs on the grill. cook for 6-8 minutes per side,flipping onyl once to maintain juiciness. You’re aiming for a beautifully charred exterior while keeping the inside tender and moist. Use a meat thermometer to check for an internal temperature of 165°F (74°C).
- Rest the grilled chicken: Remove from heat and tent loosely with foil for 5 minutes. This step lets juices redistribute, resulting in a perfect bite every time.
- Garnish and serve: Sprinkle freshly chopped parsley over the grilled chicken to add a pop of color and fresh herbal brightness.
Tips for Success
- for the most authentic Mediterranean grill experience, always use extra virgin olive oil-its flavor is unmatched and pairs beautifully with herbs and spices.
- If you’re short on time, marinate at least 30 minutes, but remember flavor deepens dramatically with longer rest.
- Resist the urge to flip the meat frequently. One flip ensures a proper crust develops, locking in juices.
- Use a grill thermometer or instant-read thermometer to avoid undercooking or overcooking-a key to juicy, safe chicken.
- Experiment with fresh herbs like thyme or rosemary for unique variations on traditional spice blends.
- To make ahead, marinate chicken overnight and store covered in the refrigerator. Grill just before serving.
Serving Suggestions
Pair your Mediterranean grilled chicken with a vibrant tabbouleh salad featuring bulgur wheat, fresh parsley, mint, diced tomatoes, and lemon juice. A side of creamy tzatziki adds cooling contrast, while grilled pita bread invites scooping and savoring every bite. For beverages,a chilled sparkling water infused with cucumber and fresh mint refreshes the palate perfectly,while freshly squeezed lemonade brings light sweetness.
Plate your creation with a drizzle of extra virgin olive oil and an extra sprinkle of fresh herbs for an eye-catching presentation. A wedge of lemon on the side lets guests add an extra zing of brightness.

| Nutrient | Amount per serving |
|---|---|
| Calories | 280 kcal |
| Protein | 32 g |
| Carbohydrates | 2 g |
| Fat | 15 g |
Discover more ways to bring Mediterranean magic to your kitchen by exploring our collection of Mediterranean recipes. For deeper insights into the spice blends used here, check out this Serious Eats guide on Mediterranean spices, a trustworthy reference for bold and authentic flavors.
Q&A
Q&A: Savor the Flavors – secrets to Perfect Mediterranean Grills
Q1: What makes Mediterranean grilling distinct from other grilling styles?
A1: Mediterranean grilling is a vibrant dance of fresh herbs, bold spices, and simple, high-quality ingredients. Unlike heavy sauces, it relies on the pure essence of olive oil, garlic, lemon zest, and aromatic herbs like rosemary and oregano to bring out bright, layered flavors. The focus is on balance-smoky char mingling with bright, herbaceous notes creates that signature Mediterranean charm.
Q2: Which Mediterranean ingredients are essential for an authentic grilling experience?
A2: Olive oil is the heart of Mediterranean cooking, providing richness and aiding in caramelization. Fresh garlic and zesty lemon amplify brightness, while herbs like thyme, rosemary, oregano, and marjoram lend an earthy complexity. Don’t overlook spices such as smoked paprika and coriander seeds to add warmth and depth. Vegetables like eggplants, zucchini, and peppers also play a starring role.
Q3: How can one achieve the perfect char without overcooking delicate Mediterranean ingredients?
A3: Mastering heat control is key.Start with a hot grill to sear and seal in juices, then move ingredients to cooler spots to finish cooking gently. For veggies and thinner cuts of meat or fish, using skewers or grill baskets helps keep them stable and allows for even cooking. Regular turning and basting with herbaceous marinades keep the flavors moist without burning.
Q4: What are some creative Mediterranean marinades that enhance grilled dishes?
A4: A simple but magical marinade combines olive oil, freshly minced garlic, lemon juice, freshly chopped herbs (like basil and oregano), and a pinch of sea salt. For an extra punch, toss in smoked paprika or sumac to add smoky tang.Yogurt-based marinades with cumin and turmeric work wonders on grilled chicken or lamb alternatives, tenderizing while infusing vibrant warmth.
Q5: How do Mediterranean grills accommodate diverse dietary preferences?
A5: Mediterranean grilling celebrates plant-based and seafood options as much as meat alternatives. Think of robust grilled halloumi or marinated tofu skewers, smoky grilled calamari, or robust vegetable platters laden with eggplant, artichokes, and sweet bell peppers. This inclusivity honors traditional flavors without limiting creativity.
Q6: Any tips for serving Mediterranean grilled dishes authentically?
A6: Serve with simple sides that complement-not overpower-the grill’s freshness.Creamy tzatziki,smoky baba ganoush,or bright tabbouleh balance grilled flavors beautifully. Warm pita or crusty,herb-studded flatbreads invite diners to combine textures.Drizzle extra virgin olive oil and sprinkle flaky sea salt just before serving for that irresistible finishing touch.
Q7: Can you share a secret technique to boost flavor during grilling?
A7: Absolutely-layer flavors through thoughtful timing. Start by marinating for several hours to infuse base flavors, but just before grilling, brush on a fresh, herby glaze for a burst of aromatics and a glossy finish. Using wood chips like olive or almond wood for smoking adds a subtle, authentic Mediterranean woody fragrance that elevates every bite.
Delve into your Mediterranean grill with these secrets in hand, and transform simple ingredients into irresistible, sun-kissed feasts. Bon appétit!
Closing Remarks
As the sun sets and the grill’s embers glow, the true magic of Mediterranean cooking comes to life-where simple ingredients meet time-honored traditions, creating flavors that dance on your palate and stories that linger long after the last bite. By embracing fresh herbs, quality olive oil, and the art of careful grilling, you unlock a world of vibrant tastes that transport you straight to the sun-drenched shores of the Mediterranean. So next time you fire up the grill, remember: it’s not just about cooking food-it’s about savoring culture, history, and the irresistible joy of a perfectly seared, flavor-packed feast. Here’s to many more gatherings filled with good company and even better grilling. Bon appétit!
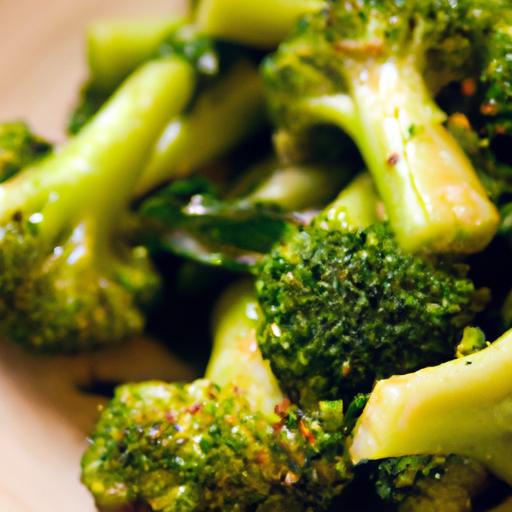
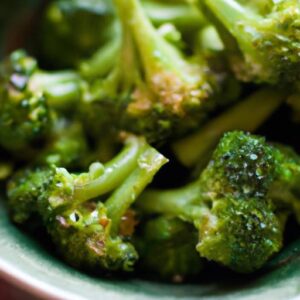
Sizzling secrets to perfectly grilled broccoli florets unlock an entirely new realm of vibrant flavour and irresistible texture.When done right, grilling broccoli takes this humble vegetable from everyday side dish to a smoky, caramelized masterpiece that steals the show at any meal. Whether you’re a seasoned griller or just starting out,mastering the selection,seasoning,and grilling techniques transforms simple florets into flavor-packed bites with the ideal char and tenderness.
Prep and Cook Time
- Preparation: 15 minutes
- Marinating: 20 minutes (optional but recommended)
- Grilling: 10 minutes
- Total Time: 45 minutes
Yield
- Serves 4 as a side dish
Difficulty Level
- Easy to Medium – perfect for backyard grillers and kitchen pros alike
Ingredients
- 2 large heads broccoli, cut into medium florets
- 3 tablespoons extra virgin olive oil
- 1 tablespoon fresh lemon juice
- 2 cloves garlic, minced
- 1 teaspoon smoked paprika
- ½ teaspoon sea salt
- ½ teaspoon freshly ground black pepper
- ¼ teaspoon red chili flakes (optional for a hint of heat)
- ¼ cup grated Parmesan cheese (optional garnish, omit for vegan option)
- Fresh parsley, chopped for garnish
Instructions
- Prepare the broccoli florets: Rinse them thoroughly and pat dry to remove excess moisture, which helps achieve better charring.
- Make the marinade: In a medium bowl, whisk together olive oil, lemon juice, minced garlic, smoked paprika, salt, black pepper, and red chili flakes if using.
- Toss broccoli in marinade: Coat each floret thoroughly and let it rest for at least 20 minutes at room temperature. This brief marination infuses vibrant smoky and tangy notes.
- Preheat grill: Heat your grill to medium-high, aiming for about 400°F. If using a charcoal grill, wait until coals are glowing red with a light layer of ash.
- Grill the florets: Using a grill basket or skewers for ease, place broccoli on the grill. Cook for 8-10 minutes, turning every 2-3 minutes to ensure even charring and tender crispness. Look for bright green color with golden, almost charred edges.
- Remove and garnish: Transfer grilled broccoli to a serving platter. Sprinkle with freshly chopped parsley and Parmesan cheese for an added burst of flavor and texture.
- Serve instantly: For the best nibble experience, serve warm as a dazzling side or part of a vibrant grilled vegetable medley.
Tips for Success
- Broccoli variety matters: Choose fresh, firm heads with tight, dark green florets such as Calabrese or Purple Sprouting broccoli for the best grilling results. Avoid yellowing or soft stems which can become mushy.
- Dry before marinating: Excess water on broccoli will steam rather than grill, compromising that coveted char.
- Grill basket magic: If your grill grates are wide,a grill basket prevents small pieces from falling through while still allowing smoky flavor to penetrate.
- Heat control: Medium-high heat delivers gorgeous caramelization without drying the broccoli out – adjust grilling time if unsure.
- Make-ahead marinade: broccoli can marinate overnight in the refrigerator; just bring it to room temperature before grilling to achieve even cooking.
- Experiment with herbs: Swap parsley for cilantro or basil for varied fresh notes to complement the smoky profile.
Serving Suggestions
Grilled broccoli shines as a bold, smoky side on its own but also adds stunning color and crunch to many plates. Try serving alongside lemon-herb roasted chicken or grilled tofu for a balanced meal. For a Mediterranean flair, drizzle warmed tahini sauce or sprinkle toasted pine nuts over the florets. Pair with fluffy quinoa pilaf or a creamy mashed cauliflower to mellow the char’s intensity. garnishing with freshly squeezed lemon zest and a dash of flaky sea salt elevates the dish beautifully. To bring contrast and freshness, a dollop of yogurt mixed with minced garlic and dill offers a delightful cooling counterpoint.

| Nutrition | Per Serving |
|---|---|
| Calories | 85 |
| Protein | 4g |
| Carbohydrates | 8g |
| fat | 5g |
For a deeper dive on grilled vegetable techniques, check out our Ultimate Guide to grilling Vegetables. To understand the amazing health benefits of broccoli, this NCBI study offers excellent scientific insights.
Q&A
Q&A: Sizzling Secrets to Perfectly Grilled Broccoli Florets
Q1: Why grill broccoli instead of steaming or boiling?
A1: Grilling broccoli adds a smoky depth and crispy char that steaming or boiling simply can’t achieve. The high heat caramelizes the natural sugars, turning broccoli florets into bite-sized bursts of flavor and texture that excite the palate.
Q2: How do I prepare broccoli florets for grilling?
A2: Start by cutting the broccoli into evenly sized florets-about two inches long for even cooking.Rinse and dry them thoroughly; moisture can hinder that crucial char. For extra flavor, toss them in olive oil, a pinch of salt, and your favorite herbs or spices before hitting the grill.
Q3: What’s the secret to achieving a perfect char without burning?
A3: Keep your grill at medium-high heat and oil the grates to prevent sticking. place the florets directly on the grill and resist the urge to move them too often-this allows nice grill marks to form. Rotate after 3-4 minutes and cook for another 3-4 minutes until tender with a slight crisp.
Q4: Can I grill broccoli on a stovetop grill pan?
A4: Absolutely! A grill pan works wonders when outdoor grilling isn’t an option. Preheat the pan on medium-high, brush the florets with oil, and grill as you would outside, turning carefully to get those iconic grill lines and smoky flavor.
Q5: What are some creative seasoning ideas to elevate grilled broccoli?
A5: Think beyond salt and pepper! Smoked paprika, garlic powder, lemon zest, chili flakes, or a sprinkle of nutritional yeast add exciting layers of taste. A drizzle of tahini or a splash of balsamic glaze after grilling can also amplify the flavor profile beautifully.
Q6: How can I tell when my grilled broccoli is perfectly cooked?
A6: The ideal grilled broccoli is tender yet firm with a crunchy bite and distinct charred edges. If the florets are limp or blackened in spots, they’ve either been undercooked or overcooked. Aim for that sweet spot were smokiness meets vibrant green.
Q7: Are there tips to keep grilled broccoli from sticking to the grill?
A7: Yes! Make sure your grill is clean and hot before placing the broccoli down. Lightly coat florets with oil and oil the grill grates as well. Using a grill basket or skewering the florets can also make flipping and removing easier while preventing sticking.
Q8: Can grilled broccoli be used in dishes other than a side?
A8: Definitely! Grilled broccoli adds smoky magic to salads,grain bowls,pastas,or even blended into creamy soups and dips.Its robust flavor pairs wonderfully with lemon, garlic, and nutty cheeses or plant-based alternatives.
Q9: What’s an easy way to serve grilled broccoli for a crowd?
A9: Grill a big batch, then toss with toasted pine nuts or almonds and a sprinkle of fresh herbs like parsley or basil.A squeeze of fresh lemon juice just before serving brightens the dish and adds a zing that guests will love.
Q10: Can I marinate broccoli before grilling?
A10: Yes, if done briefly. A rapid 15-30 minute marinade with olive oil, lemon juice, and herbs can enhance flavor without wilting the florets. Longer marinating may lead to soggy, less crisp broccoli, so keep it short and simple.
Future Outlook
As the smoky aroma of your perfectly grilled broccoli florets fills the air, you’ll discover that this humble vegetable can transform into a sizzling superstar on any grill.With these secrets under your belt, crisp-tender bites bursting with charred flavor are no longer a culinary mystery but a flavorful reality. So fire up the coals, embrace the grill marks, and let your broccoli steal the spotlight at your next barbecue-becuase great grilling isn’t just about the meat, it’s about mastering every flavor-packed bite. Happy grilling!