


Imagine the flaky, buttery layers of a perfect Danish pastry melting in yoru mouth-warm from the oven, filled with your favorite jam or cream cheese, and just sweet enough to brighten your morning. While Danish pastries often carry the reputation of being fancy or complicated to make, what if I told you that crafting that irresistible dough at home can be swift, easy, and wonderfully rewarding? Whether you’re a seasoned baker or a curious kitchen adventurer, this quick & easy Danish pastry dough recipe is designed to simplify the process without sacrificing that signature flaky texture and rich flavor. Get ready to impress yourself (and your taste buds) with a homemade treat that feels gourmet but comes together in no time!
Quick & Easy Danish Pastry Dough Recipe You’ll Love begins with selecting the perfect ingredients that set the foundation for irresistibly flaky and buttery layers. Originating from Denmark but beloved worldwide, Danish pastry combines rich, tender dough with mouthwatering fillings, creating a delightful treat that’s both elegant and comforting. Whether you’re a pastry novice or craving a quicker method without sacrificing quality, this guide simplifies your process from start to finish.
Prep and Cook Time
- Preparation: 25 minutes
- Chilling Time: 1 hour (can multitask elsewhere)
- Baking: 15-20 minutes
- Total Time: Approximately 1 hour 45 minutes
Yield
This recipe yields 12 delicious Danish pastries, perfect for sharing or freezing for future indulgence.
Difficulty level
Medium: Ideal for home bakers agreeable with basic dough handling, layering, and folding techniques.
Ingredients
- 2 1/4 cups all-purpose flour, sifted
- 1/4 cup granulated sugar
- 1 tsp fine sea salt
- 7 g active dry yeast (1 packet)
- 1/2 cup warm whole milk (about 105°F/40°C)
- 1 large egg, room temperature
- 1 tsp pure vanilla extract
- 1 cup unsalted butter, cold and sliced thinly
- 1 tbsp lemon juice (for brightness in dough)
Instructions
- Activate the Yeast: In a small bowl, combine warm milk and sugar. Sprinkle yeast on top and let it bloom for 5-10 minutes untill foamy. This step ensures your dough rises beautifully.
- Mix Dry Ingredients: In a large mixing bowl, whisk together sifted flour and salt.
- Create the Dough Base: Make a well in the flour mixture, add the egg, vanilla extract, lemon juice, and the frothy yeast mixture. Stir gently using a wooden spoon until a shaggy dough forms.
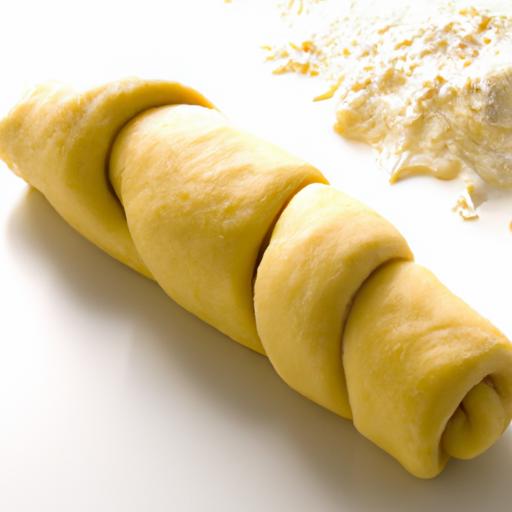
- Knead the Dough: Transfer dough to a lightly floured surface. Knead about 5 minutes until smooth but slightly sticky. Avoid over-kneading to keep your dough tender.
- Frist Chill: Shape dough into a rectangle, wrap tightly with plastic wrap, and refrigerate for 20 minutes to relax the gluten, making rolling easier.
- Prepare Butter Block: Lay parchment paper on a flat surface. Arrange the cold butter slices into a 7″ square,overlapping edges slightly. Cover and gently pound with a rolling pin to even thickness. Chill briefly if butter softens.
- Incorporate Butter: Roll chilled dough into a 10″ square on a lightly floured board. Place butter block diagonally in the center. Fold dough corners over the butter to encase completely, sealing edges carefully.
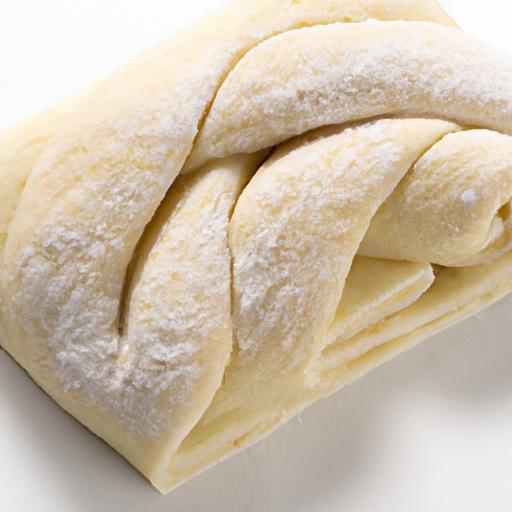
- Laminate the Dough: Roll dough into a 20″ by 10″ rectangle. Fold into thirds, like a letter (this is your first “turn”). Rotate dough 90°, roll out again to 20″ by 10″, and fold into thirds again. Wrap and refrigerate for 30 minutes. Repeat this rolling and folding process 2-3 times for perfect flaky layers.
- Final Chill: Wrap dough and chill at least 30 minutes or overnight. This step is critical for working easily with dough and achieving that beautiful puff in the oven.
- Shape and Fill: Roll out the dough, cut into desired shapes (triangles, squares, or rectangles). Add your preferred fillings before baking (see Creative Filling Ideas below).
- Bake: Preheat oven to 375°F (190°C). Brush pastries with egg wash for golden sheen. Bake on a parchment-lined tray for 15-20 minutes until puffed and golden.
tips for Success
- Use Cold Butter: The secret to flaky pastries is cold, solid butter. if it gets too soft during handling, chill dough before rolling.
- Don’t Overwork Dough: Handling dough minimally prevents tough pastry and maintains tenderness.
- Warm Liquid & yeast Timing: Milk should be warm but not hot-too hot will kill yeast.
- Make Ahead: Dough can be prepared a day ahead and refrigerated overnight. Just bring to room temperature before rolling.
- Substitutions: Unsalted butter is non-negotiable for accurate salt control, but grass-fed or European-style butter adds extra richness.
- Troubleshooting: If dough cracks while rolling,let it rest longer chilled or knead gently to hydrate.
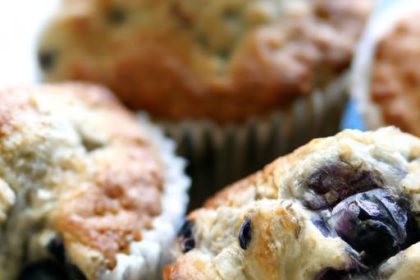
Creative Filling Ideas to Elevate Your Danish Pastry Experience
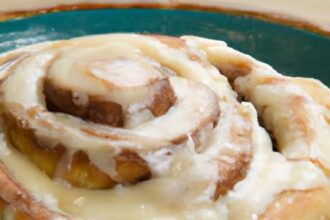
- Classic Vanilla Cream: Pip fresh vanilla pastry cream for a luscious, smooth center.
- Fruit Preserves: Use high-quality raspberry, apricot, or blueberry preserves for bright notes and tart sweetness.
- Almond Paste: Spread a thin layer of almond paste mixed with honey and lemon zest for nutty complexity.
- Cream Cheese & Citrus: Blend cream cheese with orange zest and a touch of powdered sugar for tangy decadence.
- Apple Cinnamon: Sauté diced apples with cinnamon and brown sugar briefly before filling.
Serving Suggestions
Serve your freshly baked Danish pastries warm or at room temperature on a rustic wooden board or pastel china for an inviting presentation. Garnish with a light dusting of powdered sugar or a drizzle of melted honey or glaze (powdered sugar mixed with lemon juice) for that professional bakery touch. Fresh berries or edible flowers beside your pastries brighten the plate beautifully.

| Nutrient | Per Pastry (approx.) |
|---|---|
| Calories | 280 kcal |
| Protein | 5 g |
| Carbohydrates | 32 g |
| Fat | 14 g |
For extra inspiration, check out our Homemade Pastry Tips and Techniques. To understand the science behind perfect layering, King Arthur Baking’s puff pastry guide offers fantastic insights.
Q&A
Q&A: Quick & Easy Danish Pastry Dough Recipe You’ll Love
Q1: What makes this Danish pastry dough recipe quick and easy compared to conventional methods?
A1: Traditional Danish pastry dough usually requires multiple long resting times and intricate folding processes. This quick and easy recipe streamlines those steps by using a simplified folding technique and a shorter proofing period without sacrificing the flaky, buttery layers that make Danish pastries so irresistible.
Q2: Can I use any type of flour for this Danish pastry dough?
A2: For best results, use all-purpose flour. It provides a good balance of protein to create elasticity in the dough, ensuring that it rises well and develops those delightful layers.You can experiment with bread flour for a chewier texture, but avoid low-gluten flours like cake flour as they won’t hold the structure.
Q3: How significant is the butter quality in this recipe?
A3: Butter is the star ingredient here! Using high-quality unsalted butter with a high fat content will give you that rich, tender crumb and perfect flakiness. Margarine or blends won’t deliver the same flavor or texture, so it’s worth splurging on good butter.
Q4: What’s the secret to getting those perfect, flaky layers in the dough?
A4: The key lies in the lamination process-folding the butter into the dough and rolling it out multiple times. This creates thin layers of dough separated by butter, which puff up beautifully in the oven. Even a simplified folding approach done with care ensures that buttery,flaky magic.Q5: Can I prepare this dough ahead of time?
A5: Absolutely! This dough can be made a day in advance. After completing the lamination steps, wrap the dough tightly and refrigerate overnight. This not only makes your baking day easier but also allows the gluten to relax, improving texture and flavor.
Q6: What fillings and toppings pair well with Danish pastries made from this dough?
A6: The buttery, delicate dough pairs wonderfully with a range of fillings like creamy vanilla custard, tangy fruit preserves (think raspberry or apricot), almond paste, or fresh berries. For toppings, a simple dusting of powdered sugar or a drizzle of vanilla glaze transforms these pastries into irresistible treats.
Q7: Is this Danish pastry dough suitable for beginners?
A7: Definitely! The recipe is designed with an accessible approach that doesn’t compromise on taste or texture. With clear instructions and a bit of patience during the folding and resting, even novice bakers can achieve bakery-quality results.Q8: How should I store leftover Danish pastries made from this dough?
A8: Store them in an airtight container at room temperature for up to two days. To refresh their flaky texture, warm them gently in a preheated oven at 325°F (160°C) for 5-7 minutes before serving. Avoid refrigeration, as it can dry out the pastry.
Q9: Can I freeze the dough or finished pastries?
A9: Yes! You can freeze the dough after the lamination process, wrapped tightly in plastic wrap and placed in a freezer bag, for up to one month. Thaw overnight in the fridge before shaping and baking. Finished pastries can also be frozen; warm them up directly from the freezer to enjoy fresh-baked flavor.
Q10: What’s the best way to enjoy these Danish pastries?
A10: Fresh from the oven, paired with a cup of coffee or tea, is pure bliss. Their buttery, flaky layers and sweet fillings make them perfect for breakfast, brunch, or an indulgent snack any time of day. Don’t be surprised if they become your new favorite homemade treat!
Final Thoughts
With this quick and easy Danish pastry dough recipe in your culinary toolkit, you’re just moments away from buttery, flaky delights that rival those from any bakery. Whether you’re crafting sweet swirls filled with jam or decadent cheese twists, the magic begins with a dough that’s simple to make and endlessly versatile. So roll up your sleeves, embrace the doughy adventure, and soon you’ll be savoring homemade pastries that not only taste remarkable but also carry the warmth of your own kitchen. Happy baking-and even happier indulging!