

There’s something undeniably magical about Danish pastry-the flaky, buttery layers that melt in your mouth, the sweet aroma that fills your kitchen, and the endless possibilities for delightful fillings. But the idea of making Danish pastry dough from scratch can frequently enough feel intimidating, reserved only for seasoned bakers with hours to spare. What if you could bring that classic bakery experience into your home, without the fuss? Welcome to our rapid and easy Danish pastry dough recipe-a simple, approachable method designed to deliver tender, flaky perfection with less time and effort. whether you’re craving a cinnamon twist, a fruit-filled delight, or a classic cream cheese swirl, this recipe is your new go-to for homemade pastries that impress, every single time.
Understanding the Essentials of Danish Pastry Dough Ingredients
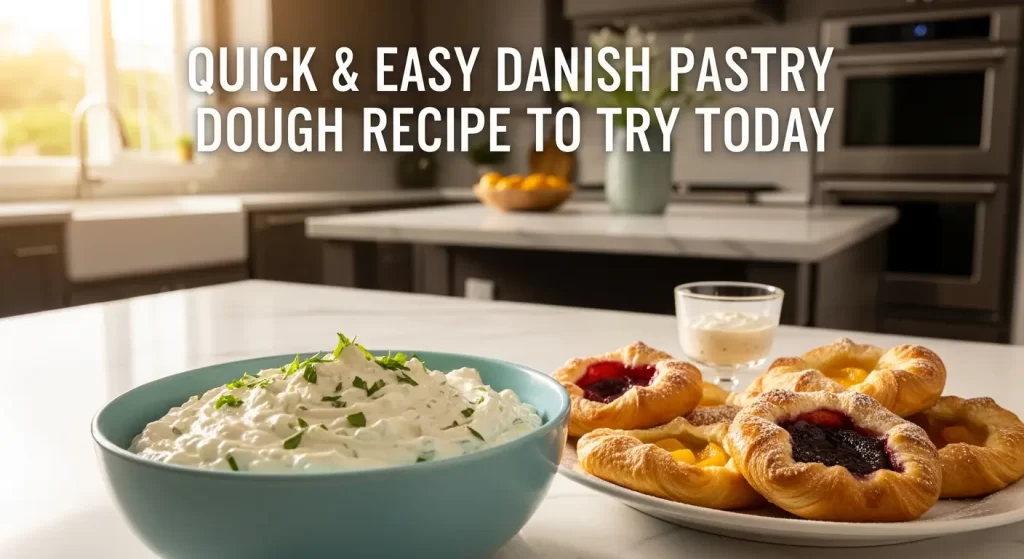
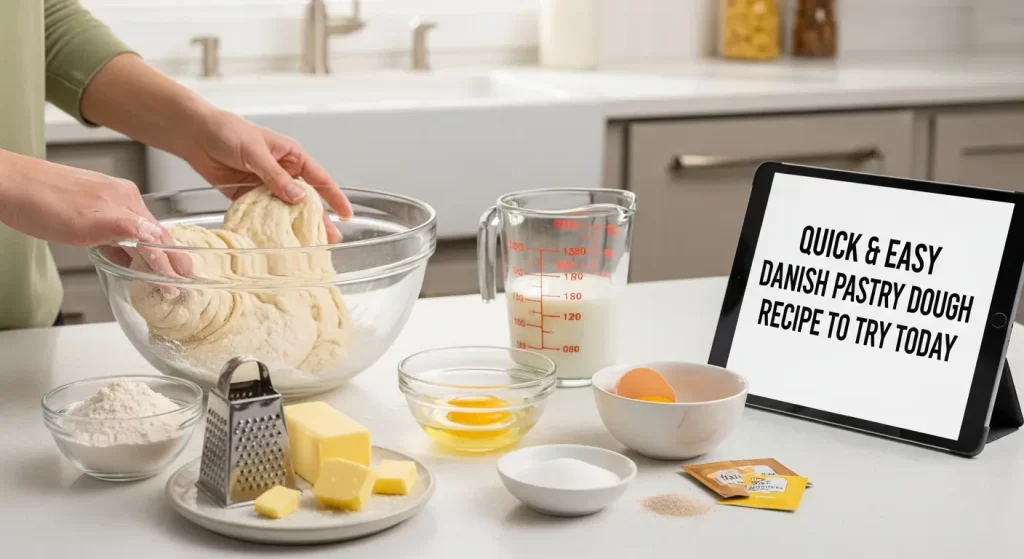
Quick & Easy Danish Pastry Dough Recipe to Try Today promises not only flaky, buttery layers but a harmonious blend of simple, quality ingredients that elevate this classic delight to irresistible heights. Rooted in centuries-old Scandinavian tradition, Danish pastry dough relies on a delicate balance of flour, butter, yeast, milk, sugar, eggs, and a hint of salt to create its characteristic texture and flavor-each playing a vital role in producing airy, tender layers that melt in your mouth.
At the core, high-protein all-purpose flour builds structure, while cold, unsalted butter provides those flaky layers during the laminating process. The yeast activates fermentation, creating subtle air pockets, and the sugar lends sweetness, activating the yeast and contributing to the golden crust. Adding eggs enriches the dough,ensuring softness,while milk adds moisture and tenderness-each ingredient must be measured precisely to strike that perfect balance between softness and structure.
Step-by-Step Guide to Mixing and Laminating Like a Pro
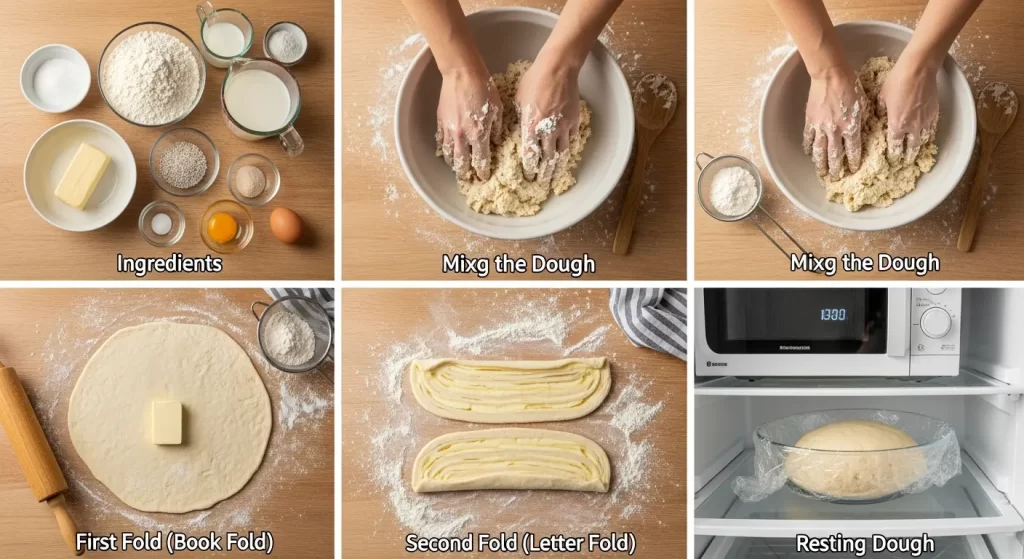
Mastering Danish pastry dough starts with careful mixing and laminating, a technique that incorporates butter into dough through repeated folds to create layers of flaky goodness.Begin by combining warm milk with yeast and sugar to proof until bubbly, signaling active fermentation. Incorporate the eggs and sifted flour, mixing gently to form a soft dough. Avoid over-kneading to keep the dough tender yet elastic.
Once the dough rests, its time to laminate: roll your chilled butter into a flat square about half the size of your dough, then encase it completely. Through a series of precise folds-usually three “turns”-you elongate and fold the dough, resting it in between to relax gluten strands. This process builds dozens of layers of dough and butter, essential for that coveted flakiness. keep everything cool to prevent the butter from melting prematurely; cold ingredients and chilled workspaces make all the difference here.
Tips for Achieving Flaky Layers without the Fuss
- Temperature Control: Keep your butter and dough cold, ideally between 40°F-55°F (4°C-13°C) throughout the process.
- Use a Light Touch: Roll gently and evenly, avoiding tearing the dough or breaking the butter layers.
- proper Resting Time: Chill the dough for at least 30 minutes between folds to prevent shrinkage and to relax the gluten.
- Sharp Tools: Use a sharp knife or bench scraper to cut the dough cleanly-ragged edges can disturb the layering.
- Don’t Rush Proofing: Let your dough rise at a warm, draft-free spot until doubled to develop flavor and proper texture.
Creative filling Ideas to Elevate Your Danish Pastries
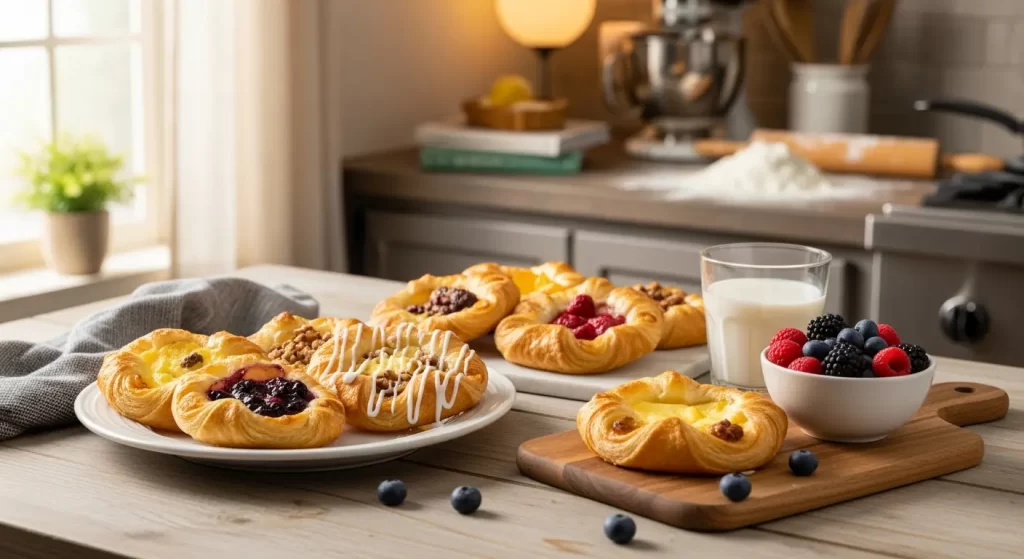
Once you’ve mastered the flaky dough, the fun really begins-introducing fillings that transform these pastries into bespoke works of art. For conventional inspiration, spread pastry cream or almond paste in the center before folding. Sweet fruit combinations like blueberries with lemon zest or spiced apple and cinnamon bring seasonal freshness, while a dollop of creamy ricotta mixed with honey and vanilla offers a luscious twist.
For a modern touch,try toppings like caramelized pear slices with toasted pecans or a tangy berry compote finished with a drizzle of dark chocolate. Glazing your pastries post-bake with a subtle vanilla glaze or dusting with powdered sugar adds an inviting shine and sweetness. These ideas help you personalize each batch, making every bite a celebration of flavor and texture.
Prep and Cook Time
- Readiness: 30 minutes (includes dough mixing,rolling,and chilling)
- Proofing: 1 to 1.5 hours
- Baking: 15 to 20 minutes
- total Time: Approximately 2 to 2.5 hours
Yield

Yields approximately 12 medium-sized Danish pastries.
Difficulty Level
Medium – Perfect for adventurous home bakers ready to impress with flaky, buttery danish treats.
Ingredients
- 2 1/4 cups (280g) all-purpose flour, sifted
- 1/4 cup (50g) granulated sugar
- 1 packet (2 1/4 tsp / 7g) active dry yeast
- 1/2 cup (120ml) whole milk, warmed to 110°F (43°C)
- 1 large egg, room temperature
- 1 tsp fine sea salt
- 1 cup (225g) unsalted butter, cold and cut into thin sheets
- 1 tsp pure vanilla extract (optional)
instructions
- Bloom the yeast: In a small bowl, combine warm milk, sugar, and yeast. Stir gently and let it sit for 5-7 minutes until foamy.
- Mix the dough: In a large bowl, whisk together flour and salt. Add the yeast mixture, egg, and vanilla extract. Stir until a sticky dough forms.
- Knead lightly: Transfer dough to a floured surface and knead gently for 5 minutes until smooth but still soft.Avoid overworking.
- First chill: Shape dough into a rectangle, cover with plastic wrap, and refrigerate for 30 minutes to relax.
- Prepare butter block: Lay out butter sheets between parchment paper and pound with a rolling pin into a 7×7-inch square. Keep chilled.
- Laminate the dough: Roll out the chilled dough to a 10×10-inch square. Place butter block in the center, folding dough edges over to encase it fully.
- First turn: Roll dough into a long rectangle about 8×24 inches. Fold into thirds like a letter. Wrap and chill for 30 minutes.
- Second & third turns: repeat rolling and folding two more times with resting intervals. Chill dough again for 30 minutes after last fold.
- shape and proof: Roll out the laminated dough to desired thickness (about 1/4 inch). Cut into squares or shapes for pastries. Add fillings of choice, shape, and proof in a warm spot until doubled, about 45 minutes.
- Bake: Preheat oven to 375°F (190°C). Brush pastries with egg wash and bake 15-20 minutes until golden and flaky.
- Cool & garnish: Allow pastries to cool slightly on a wire rack. Drizzle glaze, dust with icing sugar, or sprinkle nuts as desired.
Tips for Success
- Butter Quality Matters: Use high-grade unsalted butter with a high fat content (82%+) for the best layering and flavor.
- Maintain Cool Temperatures: chill all tools and ingredients whenever possible; warm butter can ruin the layer formation.
- Use a Digital Thermometer: Accurate temperature controls help proof yeast properly and keep butter from melting.
- Make-Ahead: dough can be prepared up to 24 hours ahead and refrigerated; bring to room temperature before continuing.
- Troubleshoot: If dough feels sticky, lightly flour your surface; if to firm, let it rest longer at room temp.
Serving suggestions
Serve your Danish pastries fresh and warm, complemented by a cup of strong coffee or a freshly brewed herbal tea. Create an inviting breakfast or brunch experience with fresh fruit on the side-think berries or sliced peaches. For a gorgeous presentation, glaze with a vanilla or lemon icing and sprinkle chopped toasted almonds or a dusting of powdered sugar for an elegant, bakery-style finish.

| Nutrient | Per Serving (1 pastry) |
|---|---|
| Calories | 320 kcal |
| Protein | 5 g |
| Carbohydrates | 30 g |
| Fat | 18 g |
For more scandinavian-inspired pastries, check out our Classic Cinnamon Rolls Recipe that perfectly pairs with your Danish goodies. Visit King Arthur baking for detailed professional insights on advanced lamination techniques and ingredient tips.
Q&A
quick & Easy Danish pastry Dough Recipe to Try Today: Q&A
Q1: What makes Danish pastry dough different from other pastry doughs?
A1: Danish pastry dough is uniquely layered and buttery, thanks to a technique called laminating-folding butter into dough multiple times to create flaky, airy layers. Unlike typical pie crust or puff pastry, it strikes a perfect balance between chewiness and crispness, resulting in that iconic golden, tender bite.
Q2: Can I really make Danish pastry dough quickly and easily at home?
A2: Absolutely! While traditional Danish dough can be time-consuming, this quick & easy recipe streamlines the process by using simple ingredients and fewer rest periods, without sacrificing that luscious flaky texture.With a bit of patience and careful folding, you’ll have bakery-worthy pastries sooner than you expect.
Q3: What are the essential ingredients in a quick Danish pastry dough?
A3: At its core, you need all-purpose flour, yeast, milk, sugar, salt, eggs, and a good quality unsalted butter. The butter is the star here-it’s what creates those dreamy, flaky layers.The yeast gives the dough a light rise, making the pastry tender and with subtle tang.
Q4: Can I substitute any ingredients if I don’t have everything on hand?
A4: You can tweak a bit – for exmaple, whole milk adds richness, but you could use 2% or plant-based milk alternatives if you prefer.It’s best to stick with unsalted butter for the laminating process rather than margarine or oils, as butter’s moisture and fat content are crucial for perfect layers.
Q5: How do I make sure the butter layers don’t melt into the dough during laminating?
A5: Temperature control is key! Keep both the dough and butter chilled but pliable. If the butter feels too soft or starts oozing as you fold, pop the dough in the fridge for a bit. Cold butter preserves distinct layers, which puff beautifully when baked.
Q6: Can I use this dough for both sweet and savory pastries?
A6: Definitely! This versatile dough serves as a fantastic base for a variety of fillings. sweet fillings like custard, fruit preserves, or almond paste pair beautifully, while savory options such as cheese and spinach or mushroom ragout shine just as brightly.The buttery layers complement any flavor profile.
Q7: How should I store leftover Danish pastry dough?
A7: Wrap the dough tightly in plastic wrap and refrigerate for up to 2 days.For longer storage, freeze it for up to a month-just thaw overnight in the fridge before using. Just remember that the yeast might lose some of its punch if stored too long, so freshly made dough always yields the best puff.
Q8: Any tips for shaping my Danish pastries?
A8: Practice makes perfect! After rolling out your dough, use a sharp knife or pastry cutter to make neat strips or squares depending on your desired shape.Don’t overfill your pastries to keep layers intact and avoid sogginess. A light egg wash before baking adds a gorgeous golden sheen.
Q9: How do I know when my Danish pastries are perfectly baked?
A9: Look for a deep golden brown color and puffed-up layers that feel light and flaky. The aroma will be irresistibly buttery and slightly sweet.When you gently tap the bottom, it should sound hollow – a sign your pastry is baked through.
Q10: What’s the best way to enjoy fresh Danish pastries?
A10: Fresh from the oven, perhaps with a dusting of powdered sugar or a drizzle of icing glaze, Danish pastries are heavenly on their own. Pair with a hot cup of coffee or tea for a relaxing treat that’s just the right balance of indulgence and comfort.
Dive into this quick and easy Danish pastry dough recipe today, and unlock the magic of flaky layers and buttery bliss right in your own kitchen!
The Conclusion
There you have it-a quick and easy Danish pastry dough recipe that brings the flaky, buttery magic of bakery classics right into your kitchen. Whether you’re craving a sweet morning treat or an impressive dessert for guests, this recipe simplifies the process without sacrificing that signature layered texture. So why wait? Roll up your sleeves, dust off your rolling pin, and embark on a deliciously rewarding baking adventure today.Your taste buds-and your guests-will thank you!