

There’s something magical about mochi-the delicate, chewy rice cakes that dance on your tongue with every bite. Rooted deeply in japanese tradition yet beloved worldwide, mochi carries a story of culture, craftsmanship, and comfort. If you’ve ever wondered how to bring this enchanting treat from the bustling streets of Tokyo or serene tea houses into your own kitchen, you’re in the right place. In this article,we’ll unlock the secrets to mastering the art of homemade mochi with easy,authentic recipes that anyone can follow.Whether you’re a curious beginner or a seasoned dessert enthusiast, prepare to embark on a culinary journey that transforms simple ingredients into bite-sized delights full of flavor and tradition.
Choosing the Perfect Mochi Rice for Authentic Texture
Master the Art of Homemade Mochi begins with understanding the star ingredient: mochigome, or glutinous short-grain rice. This special rice variety yields the signature chewy, supple texture that defines authentic mochi. Unlike regular rice, mochigome is stickier and more resilient, providing that irresistible bounce with every bite. Opt for high-quality mochigome, which you can find at Asian markets or online, ensuring it is freshly milled for maximum softness and elasticity. Avoid medium- or long-grain sticky rice, as these lack the perfect chewiness mochi demands.
Step-by-Step Guide to Crafting Smooth and Chewy Mochi Dough
Achieving the perfect mochi dough is a rewarding process that balances patience and precision. Begin by rinsing 2 cups of mochigome until the water runs clear, than soak overnight to soften the grains deeply. The next day, steam the rice for about 40 minutes until it transforms into a sticky, translucent ball of goodness. Traditionally, pounding steamed rice with a wooden mallet on a usu (mortar) is essential to create smooth dough; however, modern kitchens can achieve excellent results using a stand mixer with a dough hook or by mashing with a heavy spoon.
Once pounded, incorporate 1/4 cup cornstarch or potato starch cautiously to prevent excessive stickiness while preserving chewiness. Gently knead the dough on a starch-dusted surface, folding and pressing it until silky smooth.The texture should feel elastic but not tough, bouncing slightly when pressed with your finger. this tactile cue guarantees you’ve mastered the art of homemade mochi dough.
Traditional Fillings and Creative Flavor Combinations
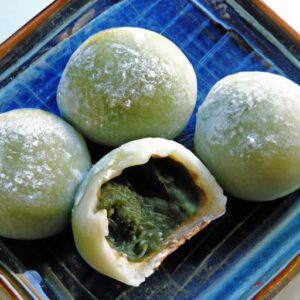
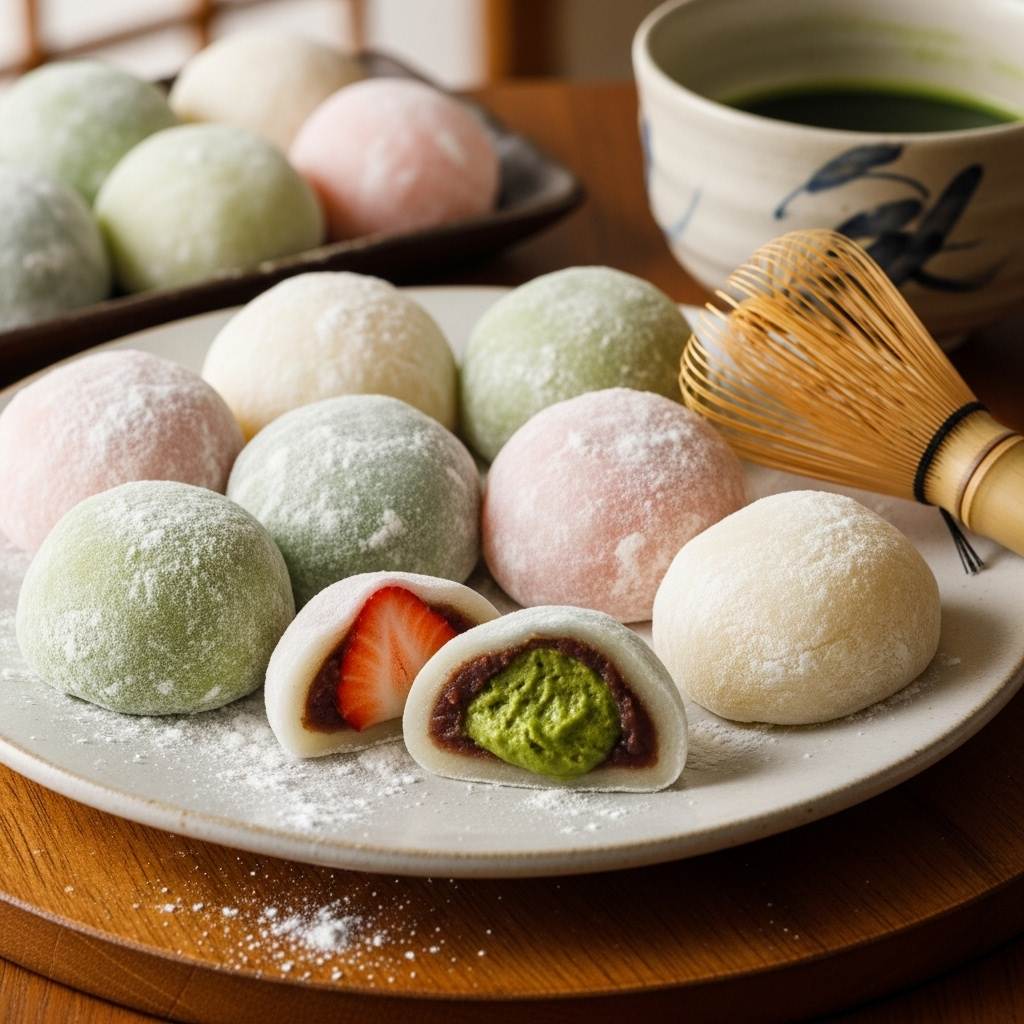
No mochi experience is complete without its luscious fillings. Classic anko (sweetened red bean paste) remains the cornerstone of tradition, offering a deep, earthy sweetness that complements the neutral mochi shell. For a modern twist, try creamy matcha green tea paste or velvety black sesame filling for a slightly nutty bite. Beyond traditional Japanese flavors, explore inventive combos such as fresh mango with coconut cream, creamy chocolate ganache, or even tangy yuzu citrus curd to elevate your mochi repertoire.
Tips for Shaping and Storing Mochi to Maintain Freshness
To shape your mochi, dust your hands liberally with starch to keep the dough from sticking, then pinch off small portions about the size of a ping pong ball. Flatten each portion into a thin disc, place your chosen filling in the center, and gently fold the edges over, sealing completely. Smooth the seams with your fingertips to create perfect, rounded mochi spheres that look as delightful as they taste.
fresh mochi is best enjoyed the same day for its ideal texture. To store, place pieces individually wrapped in plastic wrap and refrigerate for up to 2 days. For longer storage, freezing is an option-thaw at room temperature before serving, then gently steam or microwave briefly to regain softness. Avoid air exposure to prevent drying out and becoming tough.
Homemade Mochi Homemade Mochi Homemade Mochi Homemade Mochi Homemade Mochi Homemade Mochi Homemade Mochi Homemade Mochi Homemade Mochi Homemade Mochi Homemade Mochi Homemade Mochi
Prep and Cook Time
- Planning: 12 hours (including soaking)
- Active Cook Time: 1 hour
- Total Time: 13 hours
Yield
Approximately 20 mochi pieces, depending on size
Difficulty Level
medium – requires patience and attention to texture but is highly rewarding.
Ingredients
- 2 cups mochigome (glutinous short-grain rice), rinsed and soaked overnight
- 1/4 cup cornstarch or potato starch, for dusting and dough incorporation
- 1 cup sweet red bean paste (anko) or alternative filling of choice
- Optional: matcha powder, black sesame paste, or fresh fruit for fillings
Instructions
- Soak the Mochigome: Rinse the mochigome under cold water until the rinse runs clear. Soak rice in fresh water overnight (8-12 hours) for optimal moisture absorption.
- Steam the Rice: Drain the soaked rice. Steam it in a bamboo or metal steamer lined with cheesecloth for 40 minutes, ensuring even cooking and sticky texture advancement.
- pound the Rice: While hot, transfer the steamed rice onto a clean starch-dusted surface. Using a mallet or stand mixer, pound or knead the rice until the grains merge and the dough becomes smooth, elastic, and cohesive.
- Incorporate starch: Sprinkle the starch gradually into the dough while kneading to reduce excess stickiness but maintain chewiness.
- Divide and Shape: Dust your hands with starch and divide the dough into 20 equal portions. flatten each piece into a disc about 3 inches in diameter.
- Add Filling: Place a teaspoon of the sweet red bean paste (or filling of your choice) in the center of each disc. carefully fold the dough over the filling, pinching edges tightly to seal.
- Form Mochi Spheres: Gently roll the filled dough in your hands to create smooth, round mochi balls, dusting again to prevent sticking.
- Serve or Store: Enjoy instantly or store as described in the tips above to maintain freshness and texture.
Tips for Success
- Rinse and soak: These steps are essential to hydrate the rice fully for ideal pounded dough texture.
- Work quickly when pounding: Mochi cools fast and becomes firmer, so keep the dough warm for easier stretching.
- Alternate fillings: Experiment with flavors like traditional and innovative varieties for diverse taste experiences.
- Wear kitchen gloves: To prevent starch from drying your hands and improve grip when shaping.
- Troubleshooting: If dough is too sticky, add a touch more starch; if too dry, lightly steam to restore moisture.
Serving Suggestions
arrange mochi on a beautifully textured ceramic platter, lightly dusted with extra starch to prevent sticking. Garnish with edible flowers, toasted sesame seeds, or a light sprinkle of matcha powder for color contrast. Pair mochi with a cup of freshly brewed green tea or hojicha to balance sweetness with toasted, earthy notes. Serve chilled or at room temperature for best flavor and texture.
| Nutrient | Per Mochi piece (Approx.) |
|---|---|
| Calories | 90 kcal |
| Protein | 1.2 g |
| Carbohydrates | 21 g |
| Fat | 0.1 g |

Q&A
Q&A: Master the Art of Homemade Mochi: Easy & Authentic Recipes
Q1: what exactly is mochi, and why is it so beloved?
A1: Mochi is a traditional Japanese rice cake made from glutinous rice that’s been steamed and then pounded until it becomes delightfully stretchy and chewy. Its soft, pillowy texture and subtle sweetness make it a versatile treat-perfect for everything from snacks to desserts. Mochi’s charm lies in its simplicity and the nostalgic comfort it brings with every bite.
Q2: What are the basic ingredients I need to make authentic mochi at home?
A2: The foundation of authentic mochi is glutinous rice flour (also called “sweet rice flour” or “mochiko”),water,and sugar. These simple ingredients transform into that signature chewy texture with the right technique. Optional cornstarch or potato starch helps to dust and handle the mochi without sticking.
Q3: Do I need any special equipment to make mochi?
A3: While traditional mochi-making involves a heavy wooden mallet and mortar, at home you can achieve astonishing results with much simpler tools. A microwave-safe bowl or a steamer,a mixing spoon,a heat-resistant spatula,and a surface dusted with starch (like cornstarch) are all you really need. for mixing and kneading, your hands are the best tool!
Q4: How can I ensure my homemade mochi is perfectly chewy and not too sticky?
A4: The key is careful cooking time and the right balance of moisture.Overcooking can make mochi too tough, undercooking leaves it sticky and doughy. Dusting liberally with cornstarch or potato starch helps prevent stickiness and makes shaping a breeze. Also, stretching and folding the mochi gently helps develop that iconic chewy texture.
Q5: What are some popular fillings or flavorings I can try with my homemade mochi?
A5: Classic fillings include sweet red bean paste (anko), matcha (green tea) powder, and fresh fruits like strawberries. You can get creative with fillings like sweetened black sesame paste,coconut cream,or even ice cream for a modern twist. Flavor the dough itself with ingredients like cinnamon, pandan extract, or yuzu zest to add an aromatic flair.
Q6: Can mochi be stored for later,or is it best eaten fresh?
A6: Mochi is best enjoyed fresh when it’s soft and chewy. However, you can store it wrapped tightly in an airtight container at room temperature for a day or two. For longer storage, freezing is an option-just thaw at room temperature and enjoy. Keep in mind, mochi will harden in the fridge, so avoid refrigeration unless frozen.
Q7: Is mochi gluten-free and suitable for people with gluten sensitivities?
A7: Yes! Despite its chewy texture, mochi is naturally gluten-free as it uses glutinous rice flour, which contains no wheat gluten. This makes mochi a delightful treat for anyone avoiding gluten.
Q8: How can I turn mochi-making into a fun activity with family or friends?
A8: Mochi-making is wonderfully interactive! gather your loved ones to help with shaping and stuffing the mochi balls. Play with different colors and flavors, and create a mochi tasting party. Sharing this hands-on experience makes the process just as sweet as the outcome!
Q9: What are some creative ways to serve mochi beyond the traditional approach?
A9: Beyond classic mochi balls, try slicing mochi to add to soups like ozoni, pan-frying for a crispy exterior with gooey inside, wrapping around fresh fruit, or layering in parfaits. Mochi can also be grilled with a sprinkle of soy sauce and sugar for a delightful sweet-savory snack!
Q10: Where can beginners find trustworthy recipes to start mastering mochi at home?
A10: Start with recipes that use glutinous rice flour and microwave or steam methods-these are approachable for newcomers.look for resources that break down each step clearly with photos or videos. Once cozy, experiment with traditional pounding or unique fillings to deepen your mochi mastery!
To Conclude
As you wrap up your mochi-making journey, remember that each chewy, sweet bite is more than just a dessert-it’s a time-honored tradition brought to life in your own kitchen. With these easy and authentic recipes, mastering the art of homemade mochi is no longer a distant dream but a delightful reality waiting to unfold. So gather your ingredients, embrace the sticky goodness, and let every handmade mochi piece tell a story of patience, creativity, and joy. Your next kitchen adventure is just a bite away-happy mochi making!