

There’s something undeniably magical about homemade gummy candies-the chewy texture, vibrant colors, and burst of fruity flavor all wrapped up in bite-sized delight. But who says crafting these sweet treats has too be a slow, meticulous process? Enter the pressure cooker: an unlikely hero that transforms gummy-making from a time-consuming kitchen experiment into a fast, fun adventure. In this article, we’ll dive into the art of whipping up homemade gummy candies using a pressure cooker, unlocking a simple, efficient method that promises tasty results without the wait.Whether you’re a candy connoisseur or a curious kitchen explorer, get ready to discover a creative twist on a beloved treat that’s as satisfying to make as it is indeed to eat.
Choosing the Perfect Ingredients for Flavorful and Vibrant Gummies
Quick & Fun: Homemade gummy Candies in a Pressure cooker begin their magic wiht ingredient selection. Crafting gummies that burst with flavor and dazzle with vibrant colors is all about using the freshest, highest quality components. Pure fruit juices such as tart cherry,pomegranate,or pineapple provide a naturally luminous palette and intense taste without artificial additives. Opting for unflavored gelatin or a plant-based choice like agar agar ensures that your gummies achieve that coveted chewy yet tender texture without off-putting aftertastes.
For sweetness, choose organic cane sugar or a natural sweetener like honey or agave syrup to balance each bite’s tanginess. A splash of fresh lemon juice brightens the flavor, enhances the fruitiness, and helps the gelatin set perfectly. To further amplify color and health benefits, consider a pinch of natural coloring powders such as beetroot or turmeric.
mastering the Pressure Cooker Technique for Perfect Texture Every Time
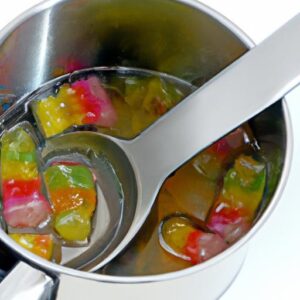
Leveraging the pressure cooker for gummy preparation transforms this typically slow craft into an ultra-efficient process without sacrificing quality. This method intensifies gelatin dissolution and flavor infusion while evenly heating the mixture,eliminating lumps or graininess.As the mixture cooks under pressure, water molecules and gelatin bonds unify flawlessly, producing a consistently smooth texture. using a pressure cooker means your gummies set quickly and release easily from molds, making the entire experience stress-free even for beginners.
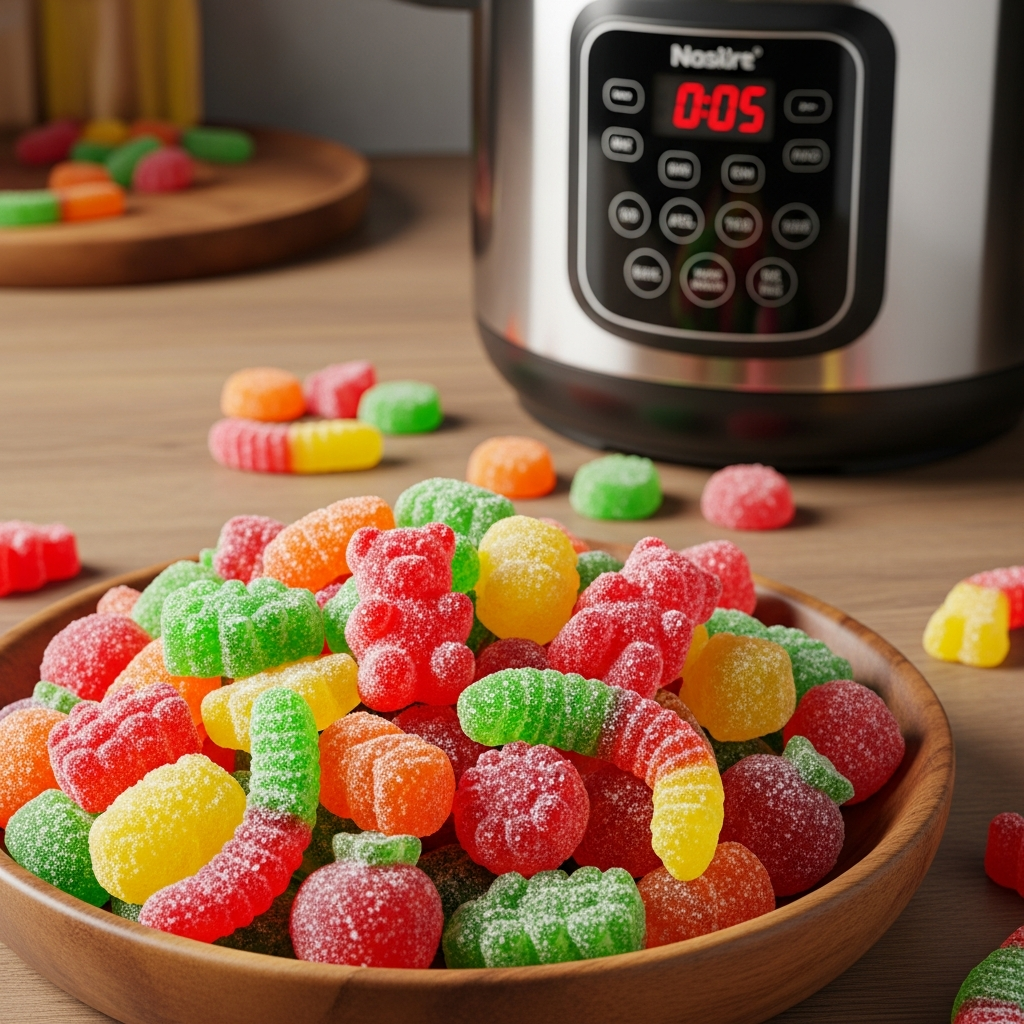
Attention to timing is crucial: too long under pressure can produce overly firm gummies,while too short results in a sticky mess. starting with 5 minutes on high pressure followed by a natural release creates that signature bouncy chewiness while preserving vibrancy. Don’t hesitate to use silicone molds with fun shapes to elevate the visual appeal of your creation-think stars, hearts, or mini fruits.
Creative Variations to Customize Your Homemade Gummies
The joy of making your own gummies lies in unlimited customization. Beyond classic fruit juices, infuse your base with herbs like fresh mint or basil for an unexpected sophistication. Adding vitamin C powder or collagen peptides can turn these treats into delightful functional snacks. For a tropical twist,blend in natural coconut water or mango puree. To subtly incorporate decadent richness, swirl in a dollop of almond butter after mixing, then mold for unique texture contrasts.
Experiment with layering colors and flavors by allowing one layer to set partially before pouring the next. For a sparkling effect, lightly dust gummies with fine sugar or edible shimmer powder just before serving. These easy techniques give your Quick & Fun: Homemade Gummy Candies in a pressure Cooker a personalized charm, making them perfect for gifting, parties, or simple everyday enjoyment.
Safe storage Tips to Keep Your Gummies Fresh and Chewy
Proper storage ensures your gummies maintain their ideal texture and vibrant taste days after preparation. Once fully set,store your candies in an airtight container at room temperature away from direct sunlight,which can fade colors and degrade gelatin. Adding a small piece of parchment paper between layers prevents sticking without affecting moisture.
For longer preservation, keeping Gummies refrigerated slows any sugar crystallization or gelatin breakdown, extending chewy freshness for up to two weeks. When ready to enjoy,allow refrigerated gummies to come to room temperature for the best mouthfeel. Avoid freezer storage as it often causes undesired changes in texture and consistency.
Prep and Cook Time
- Preparation: 10 minutes
- Cooking (Pressure Cooker): 5 minutes
- Cooling and Setting: 1-2 hours
Yield
Approximately 40 bite-sized gummies
Difficulty Level
Easy – Perfect for beginners and experienced cooks alike
Ingredients
- 1 cup fresh fruit juice (cherry, pomegranate, or pineapple recommended)
- 2 tbsp unflavored gelatin powder
- 1/4 cup organic cane sugar (adjust to taste)
- 1 tbsp fresh lemon juice
- 1/2 cup cold water
- Optional: 1 tsp natural fruit puree or herbal infusion (mint, basil)
- Optional: Pinch of natural color powders (beetroot, turmeric)
Instructions
- Bloom gelatin: In a small bowl, sprinkle the gelatin powder over cold water. Let it bloom for 5 minutes untill soft and spongy.
- Combine ingredients: Pour fruit juice, sugar, and lemon juice into the pressure cooker pot. Stir gently to dissolve sugar.
- Add bloomed gelatin: Incorporate gelatin into the juice mixture and stir gently but thoroughly.
- Cook under pressure: Seal the pressure cooker lid securely and set to high pressure for 5 minutes.
- Natural pressure release: Let the pressure release naturally for 10 minutes, then carefully open the lid.
- Pour and mold: Immediately pour the warm mixture into silicone molds, filling each cavity evenly.
- Set gummies: Refrigerate for at least 1 hour,or until fully firm and easily removable from molds.
- Unmold and store: Gently pop the gummies out and place them in an airtight container with parchment layers.
Chef’s Notes
- For vegan alternatives, replace gelatin with agar agar but cook 2-3 minutes longer to activate setting.
- Adjust sugar quantity depending on juice tartness; sweeter fruits may need less added sugar.
- If gummies are too firm, reduce gelatin slightly; if too soft, add a bit more gelatin in the next batch.
- Add a few drops of natural extracts like vanilla or orange for an extra pop of flavor.
- Make-ahead tip: Gummies keep well for up to 2 weeks refrigerated when stored properly.
Serving Suggestions
Present these cheerful Gummies on a decorative platter lined with parchment paper, or package them in small glass jars tied with twine for a delightful homemade gift.Garnish with fresh mint leaves,edible flowers,or a dusting of powdered sugar for contrast. Pair with herbal iced teas or sparkling water infused with citrus slices for a refreshing, guilt-free treat perfect for kids and adults alike.
| Nutritional Info (per serving) | Calories | Protein | Carbs | Fat |
|---|---|---|---|---|
| 1 bite-sized gummy | 25 | 1 g | 6 g | 0 g |

Explore more creative homemade candy ideas in our Healthy Homemade Fruit Snacks guide. For detailed gelatin science and best practices, visit ScienceDirect’s gelatin research.
Q&A
Q&A: Quick & Fun: Homemade Gummy Candies in a Pressure Cooker
Q1: Why use a pressure cooker to make gummy candies?
A1: A pressure cooker isn’t just for savory dishes-it’s a game-changer for candy-making! It speeds up the gelatin dissolving process, ensuring a smooth, consistent mix without scorching. plus, it locks in moisture perfectly, giving your gummies that ideal chewy texture in less time than conventional stovetop methods.
Q2: What basic ingredients do I need to make homemade gummy candies?
A2: The essentials are simple: gelatin (or a plant-based alternative like agar for vegetarians), fruit juice or flavored liquid, sweetener (sugar, honey, or agave), and a little lemon juice or citric acid for brightness. You can also add natural food coloring or extracts for extra fun flavors and hues!
Q3: Can I customize flavors and shapes easily?
A3: Absolutely! Homemade gummies let you play with flavors-from tangy citrus to sweet berry blends. Use silicone molds in any shape-hearts, stars, or even tiny animals-to tailor your batch for parties, gifts, or everyday treats. The pressure cooker method ensures your mix sets evenly, no matter the shape.
Q4: How do I prevent gummies from sticking together after they’re made?
A4: Once your gummies are set and popped out of their molds, toss them lightly in cornstarch, powdered sugar, or a mixture of both. This coating keeps them from sticking but won’t alter the flavor or texture. Store in an airtight container to keep them fresh and chewy!
Q5: Are there vegan or allergy-friendly options for pressure cooker gummies?
A5: Definitely! Swap gelatin for agar-agar or carrageenan-both plant-based gelling agents-and use fruit juices or coconut water as your base. Just adjust setting times slightly, as these alternatives may behave differently. Always double-check ingredient labels to stay allergy-safe.
Q6: How long do homemade pressure cooker gummies last?
A6: When stored properly in an airtight container at room temperature or in the fridge, homemade gummies typically stay fresh for up to 1-2 weeks. For extended freshness, refrigeration is best, especially if you’re using juice with no preservatives.
Q7: what’s a fun twist to elevate my gummy-making experience?
A7: Try layering different colors and flavors for rainbow or ombré gummies! Pour one flavor and color first, let it partially set in the fridge, then add the next layer. the pressure cooker method creates an ultra-smooth base, perfect for these creative designs.
Q8: Any tips for making the process easier for beginners?
A8: Use silicone molds-they’re flexible and non-stick, making gummy removal a breeze. Measure ingredients carefully for consistent texture, and don’t rush the gelatin dissolving step; the pressure cooker helps but stirring gently after cooking ensures everything’s well combined. Lastly, patience is key-allow full setting time for that perfect chew!
Wrapping Up
Whipping up homemade gummy candies in a pressure cooker proves that sweet treats don’t have to be complicated or time-consuming. With just a handful of ingredients and a trusty pressure cooker, you can transform your kitchen into a mini candy factory-turning simple moments into delightful bites of fun. So next time the craving strikes, remember that the perfect gummy candy is just a quick pressure-cooker session away.Happy cooking,and even happier snacking!