

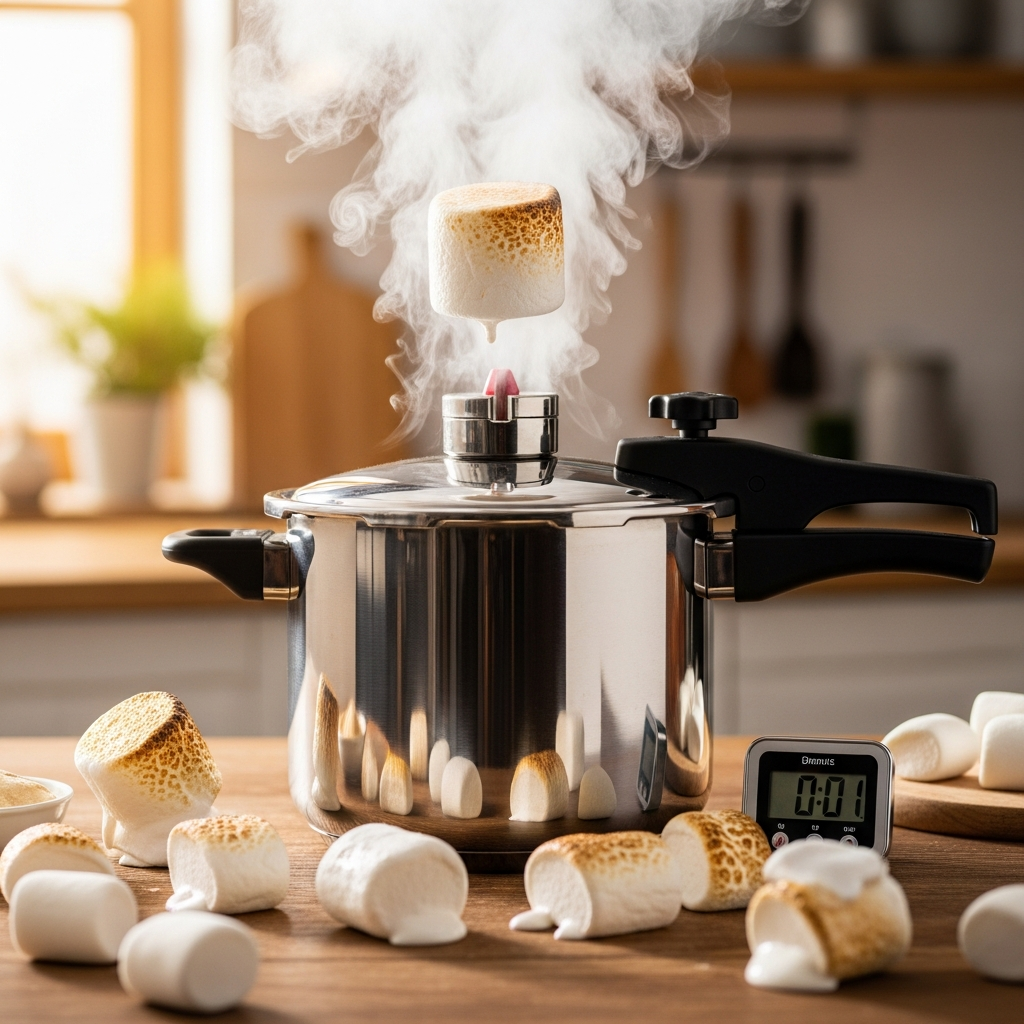
There’s something undeniably enchanting about marshmallows-their pillowy softness, sweet melt-in-your-mouth charm, and teh way they turn ordinary moments into cozy celebrations. But what if you could conjure that fluffy magic right in your own kitchen, faster and fluffier than ever before? Enter the pressure cooker: a surprising hero in the world of homemade marshmallows. In this guide, we’ll unlock the secrets to whipping up marshmallows that are not only airy and cloud-like but also rich in flavor and delightfully smooth. Whether you’re a seasoned candy crafter or a curious kitchen adventurer, prepare to be amazed by how a humble pressure cooker can transform your marshmallow-making experience from ordinary to unusual. let’s dive into the sweet science and art behind pressure cooker marshmallows-your new favorite treat,made easy.
Pressure cooker Marshmallows: Choosing the Perfect Ingredients for Irresistibly Fluffy Marshmallows
Pressure cooker marshmallows offer a delightful twist on the classic sweet treat, delivering cloud-like, smooth, and incredibly fluffy results with a technique that’s surprisingly approachable. Whether you’re a seasoned sweet-maker or just diving into homemade confections, understanding the foundation-starting with the finest ingredients-is key to elevating your marshmallow game to magical heights.
prep and Cook Time
- Preparation Time: 15 minutes
- Cook Time: 10 minutes (pressure cooking + cooling)
- Setting Time: 4 hours (or overnight)
Yield
Makes approximately 40 large marshmallows or 60 smaller bites.
Difficulty Level
Medium – Requires attentive timing and a bit of technique, but yields stunningly fluffy marshmallows.
Ingredients
- 3/4 cup cold water, divided
- 1 cup granulated sugar
- 1 cup light corn syrup
- 1/4 teaspoon kosher salt
- 3 tablespoons unflavored gelatin (about 3 packets)
- 1 tablespoon pure vanilla extract (or flavor of choice)
- Powdered sugar and cornstarch mixture for dusting (1:1 ratio)
Instructions
- Bloom the gelatin: Pour 1/2 cup cold water into a large mixing bowl, sprinkle the gelatin evenly over the surface, and allow to soften for 10 minutes. This ensures perfect dissolution and a smooth texture.
- Prepare the sugar syrup: In your pressure cooker pot insert, combine the remaining 1/4 cup water, granulated sugar, corn syrup, and kosher salt. Stir gently just to combine without splashing sugar crystals on the sides.
- Seal and cook: Secure the lid and set the pressure cooker to high for 5 minutes. The controlled high-pressure surroundings helps the syrup reach the ideal temperature without scorching or uneven caramelization, setting the foundation for that airy marshmallow structure.
- Release pressure carefully: Once done, perform a swift-release to avoid overcooking the sugar syrup. Promptly transfer the hot syrup into the gelatin bowl.
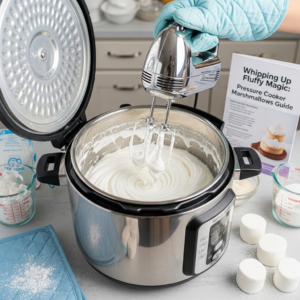
- Whip the mixture: Using a stand mixer fitted with a whisk attachment, beat the combination on low speed initially to blend, then increase to high. Whip until the mixture triples in volume and develops glossy, stiff peaks-about 10-12 minutes. Add vanilla extract during the last 30 seconds to lock in fragrance without deflating the fluff.
- Set your marshmallows: Pour the whipped mixture into a pan dusted generously with the powdered sugar and cornstarch blend. Smooth the top with an oiled spatula for an even finish.
- Allow to set: Let your marshmallows rest uncovered at room temperature for at least 4 hours, or overnight for best results. This drying phase ensures beautifully firm edges with irresistibly tender centers.
- Cut and coat: Using a sharp knife dusted in the sugar-cornstarch mix, cut your marshmallows to size and gently toss them in extra dusting blend to prevent stickiness.
Pressure Cooker Marshmallows: Flavor Infusions and Creative Twists
Unlock endless possibilities by infusing your marshmallows with natural extracts beyond vanilla-think freshly grated orange zest, toasted coconut, or a touch of peppermint oil.For a colorful twist, swirl in your favorite fruit purees during the whipping phase or fold in edible rose petals for visual charm. Specialty salts like Maldon sprinkled on top add a gourmet contrast, perfect for gifting or elevating s’mores night.
Tips for Success: Troubleshooting Common Challenges
- Clumpy gelatin: Always bloom gelatin in cold water before mixing to avoid graininess and ensure an ultra-smooth texture.
- Sticky marshmallows: generously dust your pan and cut edges with a cornstarch and powdered sugar blend to prevent excess stickiness.
- Underwhipped mixture: Marshmallows need a glossy stiff peak for structure; if soft, continue whipping and be patient-the pressure cooker technique offers consistency if mixed properly.
- Pressure cooker safety: Use a trivet or rack inside your pressure cooker when making sugar syrup to prevent scorching; always check your user manual for sugar candy warnings or settings.
- Make-ahead tips: Store marshmallows in an airtight container between sheets of parchment paper at room temperature.They stay fresh for up to two weeks!
Serving Suggestions
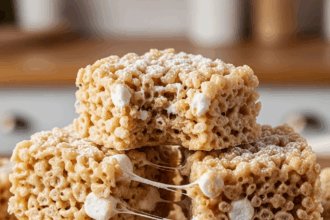
Serve your marshmallows alongside a rich homemade hot chocolate for an indulgent treat. They also make dazzling cupcake toppers or fun additions to dessert charcuterie boards. Toast lightly over an open flame or use as mix-ins in brownies and cookies for an irresistibly gooey surprise.

| Nutrient | Per 1 Large Marshmallow (approx.) |
|---|---|
| Calories | 70 kcal |
| Protein | 1 g |
| Carbohydrates | 18 g |
| Fat | 0 g |
For deeper insights on gelatin’s role in confectionery, visit Gelatin Gourmet’s Science Guide.
Q&A
Whipping Up Fluffy Magic: Pressure Cooker Marshmallows Guide – Q&A
Q1: What makes pressure cooker marshmallows different from conventional marshmallows?
A1: Pressure cooker marshmallows are a delightful twist on the classic treat, leveraging steam and consistent heat to create ultra-fluffy, irresistibly soft marshmallows. The pressure cooker creates an even cooking environment that helps the gelatin bloom perfectly and the sugar syrup reach the ideal stage, resulting in a cloud-like texture that’s simply magical.
Q2: Do I need any special ingredients to make marshmallows in a pressure cooker?
A2: Not at all! The magic lies mostly in technique and timing. Basic ingredients include sugar, light corn syrup (or a natural option like honey or agave syrup), gelatin, water, and a hint of vanilla extract for that classic flavor. Your pressure cooker does the heavy lifting by ensuring even heat without constant stirring.
Q3: How long does it take to make marshmallows in a pressure cooker?
A3: From start to finish, you’re looking at about 30 to 40 minutes. This includes allowing the gelatin to bloom, the syrup to cook under pressure, and the final whipping phase.Compared to stovetop methods,the pressure cooker speedily reaches the perfect temperature and minimizes guesswork with temperature hacks.
Q4: Can I add flavors or colors while making marshmallows in my pressure cooker?
A4: Absolutely! As soon as you remove the syrup from heat and before whisking, it’s the perfect moment to stir in your favorite flavors-think vanilla, peppermint, citrus zest, or even cocoa powder. For colors, use gel or powdered food coloring sparingly; they blend beautifully and give your marshmallows a fun, whimsical appearance.
Q5: What’s the secret to getting perfectly fluffy marshmallows every time?
A5: The key lies in a few magical spots: bloom your gelatin thoroughly before combining, monitor your hot sugar syrup stage closely (aim for the soft-ball stage around 240°F or 115°C), and beat your mixture until it triples in volume and becomes thick and glossy. The consistent pressure inside the cooker ensures these elements come together flawlessly.
Q6: Can I make vegan pressure cooker marshmallows?
A6: Yes! Swap traditional gelatin for agar agar or other plant-based gelling agents.While the textures can vary slightly, the pressure cooker method helps achieve a fluffy consistency. Just be mindful that alternative gelatins sometimes require different blooming times or temperatures, so a bit of experimentation might be needed.Q7: How shoudl I store homemade pressure cooker marshmallows?
A7: Once cooled and set, cut your marshmallows into squares and dust them in cornstarch or powdered sugar to prevent sticking. Store them in an airtight container at room temperature. They’ll stay soft and springy for up to two weeks, perfect for toasting, coffee topping, or sweet snacking anytime!
Q8: Is cleaning the pressure cooker difficult after making marshmallows?
A8: Not at all! Marshmallow syrup can be sticky, but soaking the inner pot in warm soapy water for a few minutes loosens any residue. Use a soft cloth or sponge to clean, avoiding abrasive tools.your trusty pressure cooker will be ready for the next fluffy adventure in no time.
Q9: Can I double the recipe and still expect the same fluffiness?
A9: Definitely! Just ensure your pressure cooker has enough headspace to allow steam to circulate properly. Overcrowding might affect temperature consistency and whipping volume. If you double the recipe, consider splitting it into batches for best results, or use a larger pressure cooker if you have one.
Q10: What are some creative ways to enjoy these pressure cooker marshmallows?
A10: Beyond the classic s’mores and hot chocolate companions, try them chopped into oatmeal or salads for a whimsical sweet surprise.Toast lightly and sprinkle over desserts, blend into milkshakes, or gift them in a mason jar with ribbons for a homemade magic touch. The fluffier texture creates endless opportunities to sprinkle enchantment on your sweets!
Wrapping Up
As the last pillowy bite melts on your tongue, you realize that making marshmallows isn’t just a kitchen task-it’s a delightful adventure powered by your pressure cooker’s magic. With this guide, you’ve transformed simple ingredients into clouds of sweetness, proving that homemade treats can be both accessible and enchanting. So next time you crave that fluffy, melt-in-your-mouth goodness, remember: the secret’s in the pressure, and the joy is in the journey.Happy whipping, and may your marshmallows always rise to the occasion!