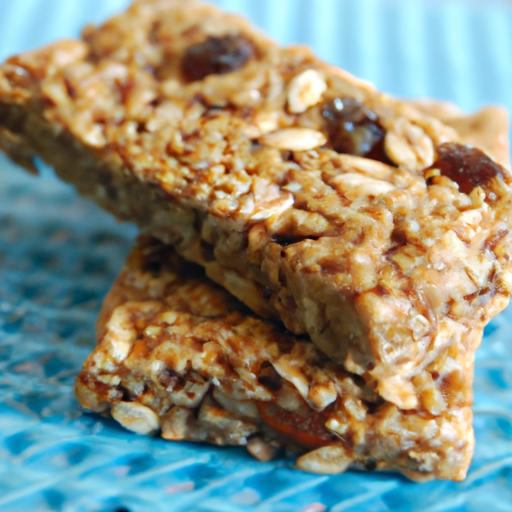
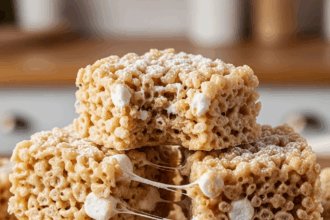

In a world where convenience frequently enough trumps nutrition, finding a snack that’s both wholesome and satisfying can feel like a quest for the holy grail. Enter homemade granola bars – little bundles of natural goodness that are as easy to make as they are delightful to eat. Packed with nutrient-rich ingredients like nuts, seeds, oats, and dried fruit, these bars aren’t just tasty treats; they’re fuel for yoru body and mind.whether you’re looking for a rapid breakfast,a midday pick-me-up,or a post-workout energy boost,crafting your own granola bars at home is a delicious way to take control of what you’re consuming. Dive in as we explore simple recipes and creative ideas to make granola bars that are truly nutritious, irresistibly flavorful, and perfectly tailored to your taste buds.
Wholesome Homemade Granola Bars: Easy, Tasty & Nutritious
Wholesome homemade granola bars are your ultimate go-to snack when you crave something nourishing, delicious, and perfectly balanced in texture. From early morning hikes to midday office breaks, these bars pack a punch of flavor and nutrients in every bite.Inspired by nature’s bounty and perfected through countless kitchen experiments, crafting your own bars lets you control every ingredient and flavor note.
Prep and Cook time
- Prep Time: 15 minutes
- cook Time: 20 minutes
- Cooling Time: 30 minutes
Yield
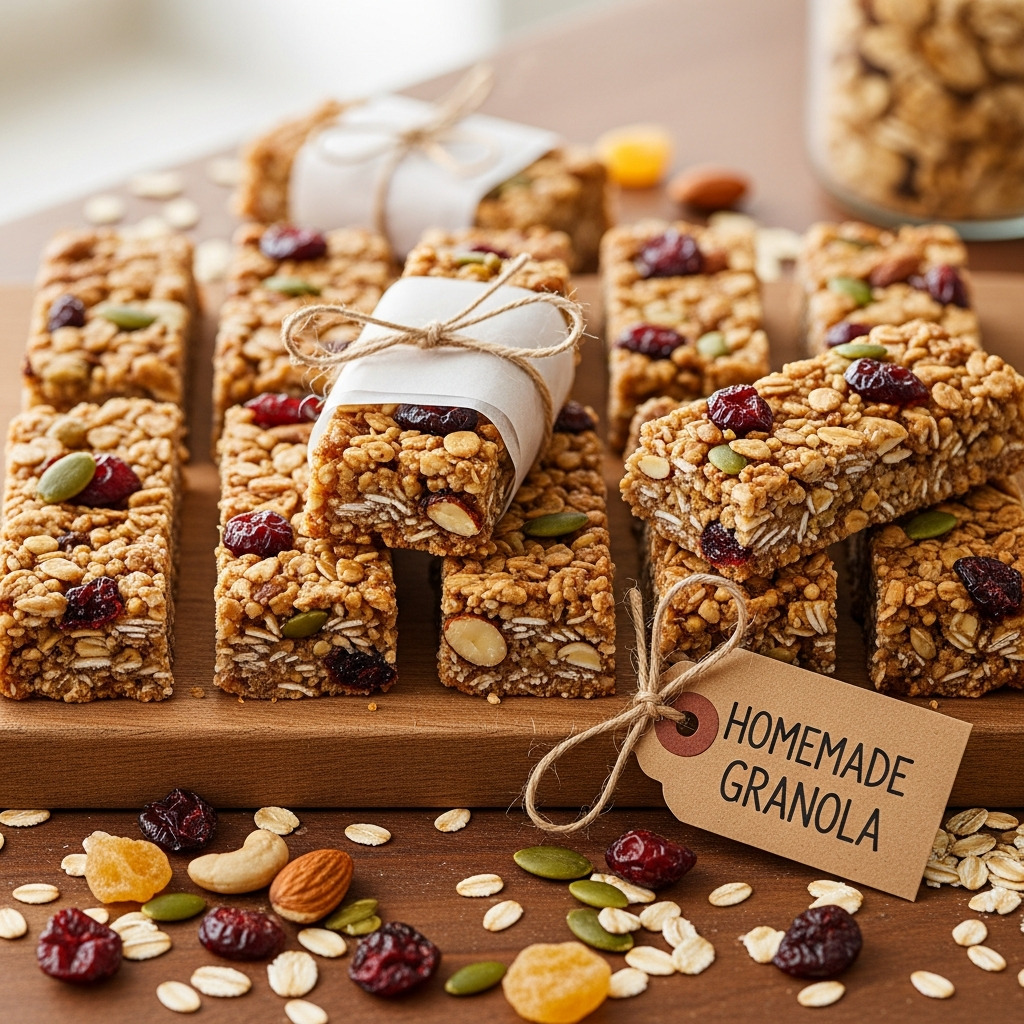
Makes 12 sizeable bars – perfect for a week of wholesome snacking
Difficulty Level
Easy: No baking expertise needed, ideal for beginners and seasoned cooks alike.
Ingredients
- 2 cups old-fashioned rolled oats (not instant)
- 1 cup mixed nuts (almonds, walnuts, pecans), roughly chopped
- 1/2 cup unsweetened shredded coconut
- 1/2 cup natural peanut butter or almond butter
- 1/3 cup honey or pure maple syrup
- 1/4 cup ground flaxseeds (adds fiber and omega-3)
- 1/2 teaspoon cinnamon (freshly ground for warmth)
- 1 teaspoon pure vanilla extract
- 1/4 teaspoon kosher salt
- 1/2 cup dark chocolate chips or dried fruit (optional)
Instructions
- Preheat your oven to 350°F (175°C).Line a 9×9-inch baking pan with parchment paper, allowing excess to hang over the edges for easy removal.
- Toast the oats and nuts: Spread the rolled oats, chopped nuts, and shredded coconut evenly on a baking sheet. Toast in the oven for 10-12 minutes until golden and fragrant. Watch carefully to avoid burning, stirring once halfway through.
- Mix the wet ingredients: In a medium saucepan over low heat,gently warm the peanut butter and honey until they blend smoothly. Stir in vanilla extract, cinnamon, and salt.
- Combine dry and wet ingredients: In a large mixing bowl, combine the toasted oats and nuts with ground flaxseeds. Pour the warm peanut butter mixture over and stir until every bit is coated.
- add mix-ins: Fold in dark chocolate chips or dried fruit if using – they’ll add bursts of flavor and a delightful chew.
- Press firmly into the pan: Transfer the mixture into your prepared pan and press down with a spatula or your hand lined with parchment paper, compacting it tightly to ensure the bars hold together well.
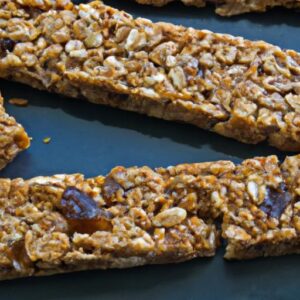
- Bake for 15-20 minutes: This step adds a subtle crispness to the edges, but the inside stays chewy and moist. Remove and let cool for 30 minutes in the pan.
- Cut and enjoy: Use the parchment overhang to lift the block out, place it on a cutting board, and slice into bars or squares of your preferred size.
Tips for Success: Customizing and Mastering Texture
- Balance is key: The perfect granola bar combines chewy oats and sticky nut butter with crunchy nuts and optional sweet bursts like chocolate. Adjust nut-to-oat ratio to tweak texture-more nuts give crunch; more oats add chewiness.
- Customize freely: Swap the peanut butter for sunflower seed butter if allergies arise, or add seeds like pumpkin or chia for extra nutrition.
- Sweetness matters: Honey or maple syrup work wonderfully, but reduce quantity if adding sweeter mix-ins like chocolate chips.
- press down firmly: Don’t skimp on compacting the bars before baking to avoid crumbling later.
- Storage tip: Wrap bars individually in parchment or store in an airtight container. They stay fresh at room temperature up to a week, or freeze for monthly enjoyment.
Serving Suggestions
Wholesome homemade granola bars are fantastic on their own, but elevate your snack time with these ideas:
- Top with a swipe of nut butter and fresh berries for a vibrant breakfast.
- pair with a warm cup of herbal tea or cold brew coffee for an energizing afternoon boost.
- Crumble over a bowl of Greek yogurt drizzled with honey for a nutrient-packed parfait.
- Wrap in colorful parchment for a stunning lunchbox surprise or hiking treat.

Nutritional Data (Per Bar)
| Calories | Protein | Carbs | Fat |
|---|---|---|---|
| 180 kcal | 5 g | 20 g | 9 g |
For more wholesome snack ideas and easy recipes, check out our Healthy Snack Recipes collection.
Learn more about the nutritional powerhouse of oats and nuts at ChooseMyPlate.gov Protein Foods.
Q&A
Wholesome Homemade Granola Bars: Easy, Tasty & Nutritious
Q&A to Crunch Into Your New Favourite snack
Q1: Why should I make homemade granola bars instead of buying them?
A: Homemade granola bars let you control every ingredient, ensuring your snack is free from unwanted preservatives, excess sugar, and artificial additives. Plus, you can tailor the flavors and textures exactly to your liking-whether you crave chewy, crunchy, nutty, or fruity. It’s a joy to create a snack that’s as wholesome as it is delicious!
Q2: What are the essential ingredients for making nutritious granola bars?
A: Start with a base of rolled oats for slow-release energy, add natural sweeteners like honey or maple syrup, and bind it all together with nut butters such as almond or peanut butter. Toss in nuts, seeds, and dried fruits for crunch and vitamins. A pinch of cinnamon or vanilla extract can lift the flavor to a whole new level, too.Q3: How can I keep granola bars chewy rather than brittle?
A: The secret lies in the balance of wet and dry ingredients. Using enough sticky binders-like nut butter combined with honey or maple syrup-and gently pressing the mixture firmly into the pan before chilling helps bars hold together while maintaining that satisfying chew.
Q4: Are homemade granola bars a really nutritious snack?
A: Absolutely! When made with wholesome ingredients, these bars pack fiber from oats, healthy fats from nuts and seeds, natural sweetness from fruit, and plenty of vitamins and minerals. They provide a sustained energy boost, perfect for breakfast on-the-go, midday refueling, or a post-workout pick-me-up.Q5: Can I customize granola bars to suit dietary needs like gluten-free or vegan?
A: Yes! Use certified gluten-free oats if you’re avoiding gluten. Swap honey for maple syrup or agave nectar to keep bars vegan.There are endless substitutions-from replacing nuts with seeds if allergies are a concern, to adjusting sweetness and mix-ins according to preference.
Q6: How should I store homemade granola bars to maintain freshness?
A: Store bars airtight at room temperature for up to a week. For longer shelf life, refrigerate them, where they’ll stay fresh for up to two weeks, or freeze for up to three months. Just thaw at room temperature before enjoying!
Q7: Any clever tips to elevate my granola bar game?
A: experiment with spices like cardamom or ginger for a warming twist. Add shredded coconut or dark chocolate chips for bursts of sweetness. Toast your nuts beforehand for a rich, roasted flavor. And don’t forget to press your mixture firmly-solid bars make snacking so much easier!
Ready to transform your snack routine? Whip up a batch of homemade granola bars and munch your way to wholesome goodness!
In Retrospect
With their perfect blend of wholesome ingredients and customizable flavors, homemade granola bars offer a deliciously simple way to fuel your day the natural way. Whether you’re powering through a busy morning, need a post-workout boost, or just crave a guilt-free treat, these easy-to-make bars bring together taste and nutrition in every bite. So next time you’re reaching for a snack, remember: the healthiest, tastiest option might just be waiting for you in your own kitchen. Happy baking and even happier snacking!