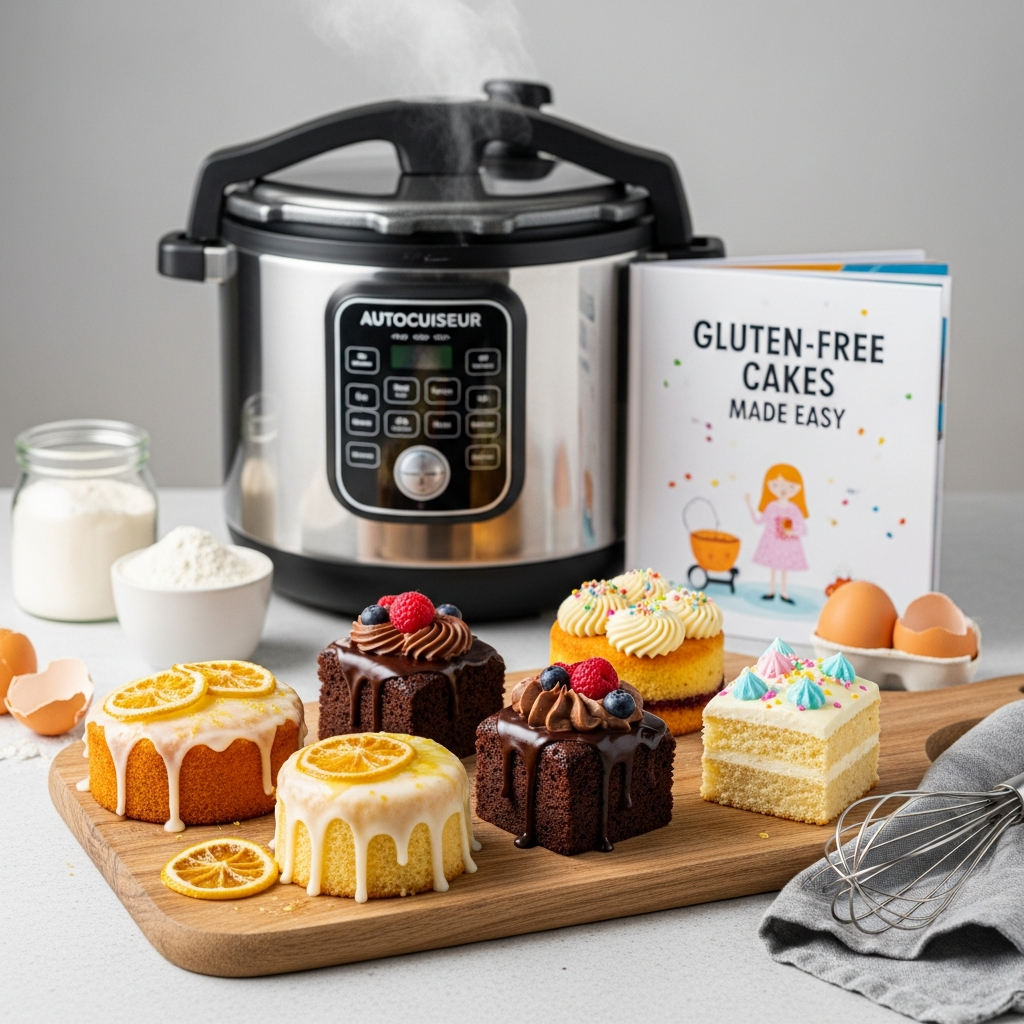
In the vibrant world of baking, crafting the perfect gluten-free cake can often feel like a delicate dance – a balance of texture, flavor, and flawless rise. But what if there where a way to effortlessly transform simple ingredients into moist, tender cakes without the guesswork? Enter the autocuiseur, or electric pressure cooker, a modern kitchen marvel that’s rewriting the rules of gluten-free baking. With its precise temperature control and steam-powered magic, the autocuiseur takes the mystery out of gluten-free cakes, delivering consistently delightful results with minimal effort. Join us as we explore how this underrated appliance can revolutionize your baking routine, turning gluten-free cake making into an easy, enchanting experience.
Gluten-Free Cakes Made Easy: Autocuiseur Baking Magic transforms how you experience baking by marrying the convenience of a pressure cooker with the artistry of gluten-free flour blends. As someone who has navigated the challenges of crafting moist, airy cakes without gluten, I can attest to the magic that happens when the right flours meet precise autocuiseur techniques. This approach not only ensures a tender crumb and delightful rise but also unlocks deep, natural flavors with minimal fuss. Whether you’re baking for dietary needs or simply exploring new textures, these tips and recipes will turn your autocuiseur into your new favorite baking companion.
Prep and Cook Time
- Planning: 15 minutes
- Cooking: 40 minutes (in autocuiseur)
- Cooling: 20 minutes
- Total Time: 1 hour 15 minutes
Yield
Serves 6-8 slices
Difficulty Level
Easy to Medium – Perfect for bakers eager to experiment with gluten-free textures without complexity.
ingredients
- 1 cup gluten-free all-purpose flour blend (ideally a mix with rice, tapioca, and potato starch)
- ½ cup almond flour (for moisture and subtle nutty flavor)
- ¼ cup coconut flour (adds structure and absorbency)
- 1 tsp baking powder (gluten-free, aluminum-free)
- ½ tsp baking soda
- ¼ tsp salt
- 3 large eggs, at room temperature
- ½ cup coconut sugar (a natural sweetener with caramel notes)
- ½ cup plain Greek yogurt (or unsweetened dairy-free alternative)
- ¼ cup melted coconut oil (or neutral vegetable oil)
- 1 tsp vanilla extract
- ½ cup unsweetened almond milk (or preferred milk substitute)
- Optional: ¼ cup finely chopped dark chocolate or fresh berries
Instructions
- Prepare your autocuiseur: Pour 1.5 cups of water into the bottom of the autocuiseur pot. Place a trivet or steaming rack inside and lightly grease an 8-inch round cake pan that fits comfortably on the rack.
- Whisk dry ingredients: In a large bowl, sift together the gluten-free all-purpose flour, almond flour, coconut flour, baking powder, baking soda, and salt. This prevents clumping and ensures even leavening.
- Mix wet ingredients: in a separate bowl, beat the eggs and coconut sugar untill creamy and slightly pale. Stir in the Greek yogurt, melted coconut oil, vanilla extract, and almond milk.A smooth, homogenous mixture will help your cake’s texture.
- Combine gently: Pour the wet mixture into the dry ingredients and fold carefully with a spatula. Avoid overmixing, which can lead to a dense crumb. If using chocolate or berries, fold them in now for delightful bursts of flavor.
- Transfer and seal: Pour the batter into the prepared pan and cover the top tightly with foil to protect moisture. Place the pan on the steaming rack in the autocuiseur and secure the lid.
- Cook under pressure: Set to high pressure and cook for 40 minutes. When time’s up, allow a natural pressure release for about 10 minutes before opening the lid to preserve the cake’s tender crumb and height.
- Cool and unmold: Carefully remove the cake pan using oven mitts. Let the cake cool for 20 minutes before gently running a knife around the edges and inverting it onto a cooling rack.
Tips for Success
- Flour blends: Use a trusted gluten-free all-purpose blend with xanthan gum included for optimum texture. Adding almond and coconut flour balances moisture and firmness.
- Avoiding dryness: The Greek yogurt and coconut oil are key to a moist crumb; substitute unsweetened applesauce if you prefer less fat, but reduce almond milk slightly to maintain balance.
- Natural sweeteners: Coconut sugar adds caramel undertones and depth.For variety, try maple syrup but reduce liquid in the recipe by 3 tbsp accordingly.
- Autocuiseur handling: Seal the cake pan well with foil to avoid condensation dripping onto your batter, which can alter texture.
- flavor boosts: Enhance your gluten-free cake with lemon zest,cardamom,or a swirl of homemade fruit preserves before cooking for extra aroma and visual appeal.
- Make-ahead: Cakes baked in the autocuiseur keep beautifully for 2 days at room temperature, or freeze sliced portions individually wrapped for up to 2 months.
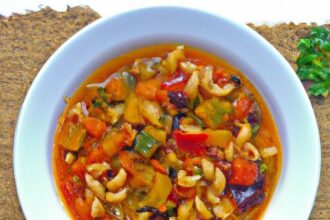
Serving Suggestions
Present your gluten-free cake on a rustic wooden board or pastel ceramic plate, dusted lightly with powdered sugar or a shimmer of cacao powder. A dollop of whipped coconut cream or vegan frosting adds richness without overpowering.Fresh berries or edible flowers atop each slice brighten the plate and echo the natural sweetness within. Pair with freshly brewed herbal tea or a creamy latte to complete the comforting experience of this effortless yet elegant dessert.
| Nutritional Info (per serving) | Calories | Protein | Carbs | Fat |
|---|---|---|---|---|
| gluten-Free Cake slice | 220 kcal | 6g | 25g | 11g |
For more inspiration on gluten-free baking and to deepen your mastery of kitchen techniques, check out our complete Gluten-Free Desserts Guide. For detailed insights on the science behind pressure cooking, visit the Serious Eats article on pressure cooker baking.

Q&A
Q&A: Gluten-Free Cakes Made Easy – Autocuiseur Baking Magic
Q1: What is an autocuiseur, and how does it revolutionize gluten-free cake baking?
A1: An autocuiseur, commonly known as an electric pressure cooker, is a versatile kitchen marvel that accelerates cooking by using steam pressure. For gluten-free cakes, it beautifully locks in moisture and cooks evenly, transforming dense, crumbly batters into tender, fluffy delights without the need for complex techniques or long baking times.
Q2: Why are gluten-free cakes often challenging to bake, and how does an autocuiseur help?
A2: Gluten-free flours lack the elastic network that wheat gluten provides, frequently resulting in dry or crumbly textures.The autocuiseur’s sealed environment ensures consistent humidity and temperature, helping gluten-free cake batters rise properly and stay moist, overcoming common baking hurdles with ease.
Q3: Can I use any gluten-free flour blend in an autocuiseur cake recipe?
A3: Moast gluten-free flour blends work well, especially those designed for baking that combine rice flour, tapioca starch, and potato starch. The autocuiseur’s moisture control complements these blends, but for best results, choose a blend that includes a binding agent like xanthan gum or guar gum to help structure the cake.
Q4: How do I prepare my autocuiseur for baking a gluten-free cake?
A4: Start by greasing a silicone or metal cake pan that fits your autocuiseur. Pour in your prepared gluten-free batter, then add a cup of water to the cooker’s base to generate steam. Place the pan inside,secure the lid,and select the ‘pressure cook’ or ‘manual’ mode at the recommended time,often shorter than traditional baking.
Q5: Are there specific flavors or ingredients that pair exceptionally well with gluten-free cakes baked in an autocuiseur?
A5: Absolutely! Fresh citrus zest, vanilla bean, cinnamon, and almond extract all shine when baked under pressure, enhancing flavor without drying out the cake. Adding ingredients like mashed banana, applesauce, or coconut milk boosts moisture and richness-perfect companions in an autocuiseur.
Q6: How does the texture of gluten-free cakes baked in an autocuiseur compare to oven-baked ones?
A6: Cakes from an autocuiseur tend to be more uniformly moist and tender, thanks to the steam-rich environment. They often have a soft crumb and a delicate outer crust, rather than the drier edges that can result from conventional oven baking.
Q7: Can I bake layered cakes or cupcakes in an autocuiseur?
A7: Layered cakes are doable with multiple small pans or careful timing.Cupcakes can also be made by using silicone molds that fit inside the cooker. Just be mindful of space and cooking times; steam pressure distributes heat differently than an oven, so adjustments may be necessary.
Q8: What are some tips for preventing a gluten-free cake from sticking to the pan in an autocuiseur?
A8: Greasing and flouring your cake pan with a gluten-free flour or lining it with parchment paper works wonders. Choosing silicone pans can also reduce sticking.After baking, let the cake cool slightly before attempting to remove it, ensuring it sets properly.
Q9: Is it possible to add frosting or glaze to an autocuiseur-baked gluten-free cake?
A9: Absolutely! Once cooled, your moist cake is a perfect canvas for your favorite frostings or glazes-from dairy-free buttercream to fruit compotes. The gentle texture supports toppings beautifully, making every bite a flavorful festivity.
Q10: How can beginners master gluten-free cake baking with an autocuiseur?
A10: Start simple: pick a trusted gluten-free cake recipe,measure ingredients precisely,and practice the autocuiseur’s timing and settings. Experiment with different flours and flavor add-ins, and don’t be afraid to get creative-this magical appliance turns baking into an adventure with delicious rewards!
Embark on your gluten-free baking journey with the magic of the autocuiseur – where convenience meets culinary delight, turning each cake into a moist masterpiece!
The Conclusion
Baking gluten-free cakes no longer needs to be a daunting task reserved for the patient and the precise. With the magic of the autocuiseur, you can transform simple, wholesome ingredients into moist, flavorful delights-all without the fuss of intricate oven settings or hovering timers. this clever kitchen companion not only simplifies the process but also unlocks new textures and tastes that might surprise even seasoned bakers. So next time you crave a guilt-free treat or want to impress friends with a delicious, allergen-friendly dessert, remember: the secret to easy, flawless gluten-free cakes might just be a press of a button away. happy baking!